Open topic with navigation
Installing OpenSUSE or SLES direct to SAN
This section provides step-by-step instructions on how to install and boot SUSE Linux Enterprise Server (SLES) 10 (or later) from iSCSI SAN directly using Double-Take Flex. No special hardware is required. Any server equipped with a PXE-bootable network interface card (NIC) and hardware compatible with SLES 10 (or later) is supported.
Prerequisites
This section lists the prerequisites for installing OpenSUSE or SLES direct to SAN.
Hardware
- PC Server (x86 or x64-based system) that supports SLES 10 (or later)
- A network adapter with a PXE boot ROM (PXE v2.0 or later)
- iSCSI target (or software iSCSI target)
Software
- Double-Take Flex
- SLES 10 SP1 (or later) DVD
Infrastructure preparation
To prepare for installing OpenSUSE or SLES direct to SAN, perform the following tasks:
- On a server, install the Double-Take Flex Management Server.
See Installing the Double-Take Flex Management Server.
- In the Double-Take Flex Management Console, configure the Double-Take Flex services.
See Configuring Double-Take Flex services.
- Define a portal where you will configure an iSCSI target.
See Working with portals.
- Configure an iSCSI target.
See Working with targets.
- Add the client.
See Working with Flex Clients. You can optionally create a group and add the client to the group. If you want to use groups, see Working with Flex Client groups.
- Enable the Double-Take Flex PXE boot menu for the iSCSI boot client (the machine that you want to run RHEL on). After installation is complete, it is recommended that you disable the PXE boot menu. You can select this option on the Advanced tab in the Properties dialog box for the Flex Client or Flex Client group.
- Assign the target to the client.
See Working with target associations.
- Insert the SLES DVD into the Double-Take Flex Client and power it on.
Installing SLES on an iSCSI SAN target
To install SLES on an ISCSI SAN target, perform the following steps:
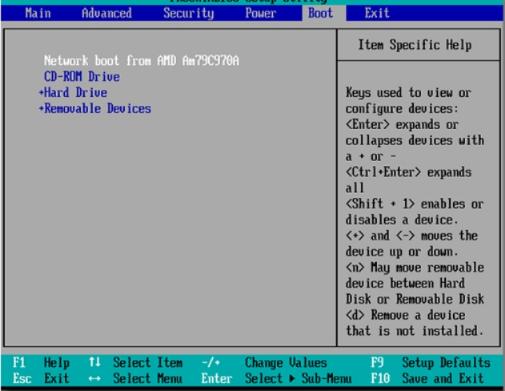
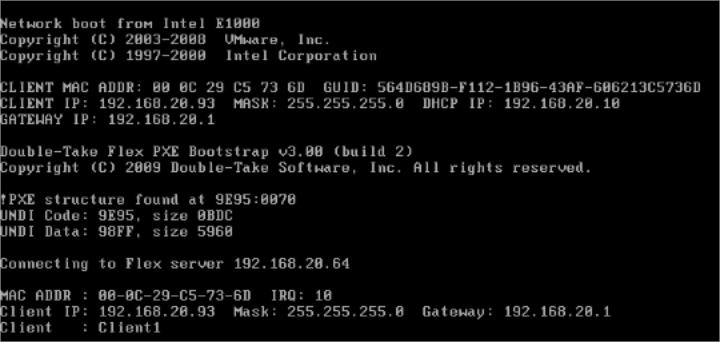
- In the client's BIOS Setup, configure the boot order of the client so that the Network boot (PXE boot) is first followed by CD-ROM. Press Enter. When prompted to confirm the selection, select Yes and press Enter.
- Boot the client.
The client will boot from the Double-Take Flex Management Server using PXE.
- In the Double-Take Flex Management Console, select the PXE boot menu checkbox for the Flex Client or Flex Client group. You can select this option on the Advanced tab in the Properties dialog box for the Flex Client or Flex Client group.

The client will then boot from the SLES DVD, and the Boot Options page is displayed.

- Select Installation and type withiscsi=1 netsetup=1 in the Boot Options field. Press Enter.
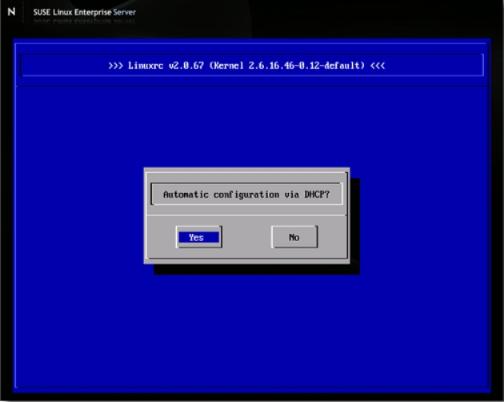
- Configure DHCP. In this example, Yes was selected. If you select No, you will be asked to provide specific IP address information. Press Enter.
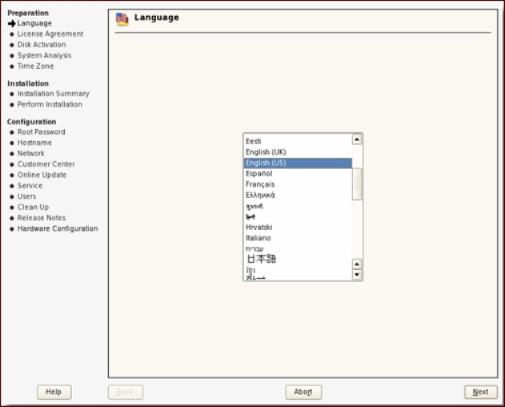
- On the Language page, select English (US) and click Next.
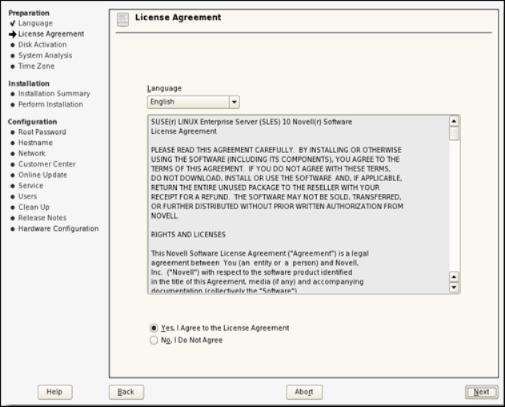
- On the License Agreement page, read and agree to the license agreement then click Next.

- On the iSCSI Initiator Overview page, review the parameters and click Next.
|
Note:
|
This step is slightly different for SLES 11. The iSCSI initiator presents a separate iBFT tab that should be confirmed to contain the parameters passed by the Flex Client PXE boot. You can also use the Add button to manually add the parameters required to connect to the desired iSCSI disk.
|
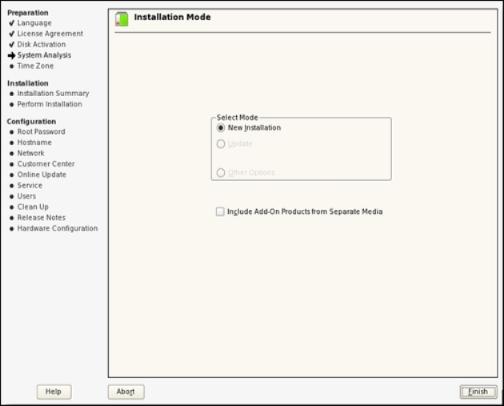
- On the Installation Mode page, select New Installation and click Finish.
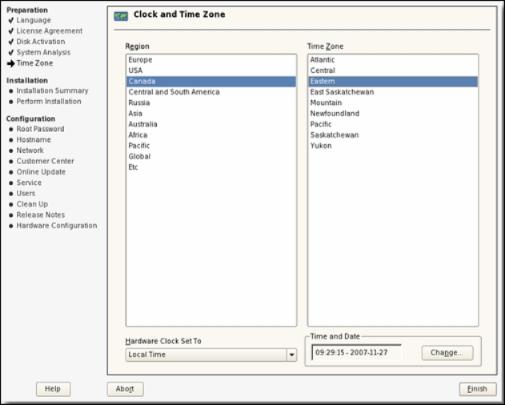
- On the Clock and Time Zone page, make the appropriate selections for your region and click Finish.
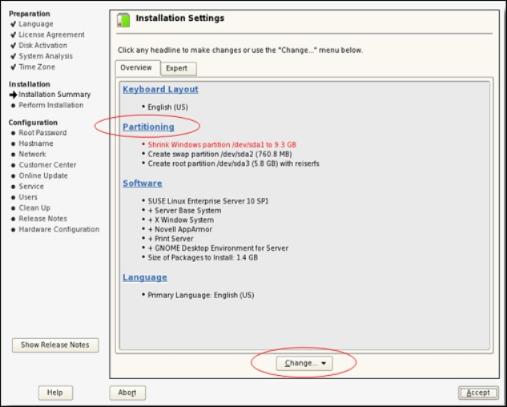
- (IMPORTANT) On the Installation Settings page, click Change and select Partitioning.
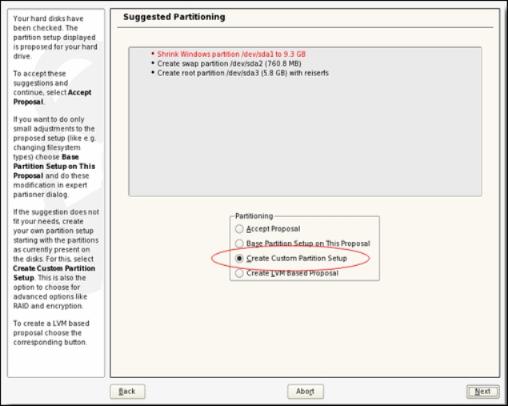
- On the Suggested Partitioning page, select Create Custom Partition Setup and click Next.
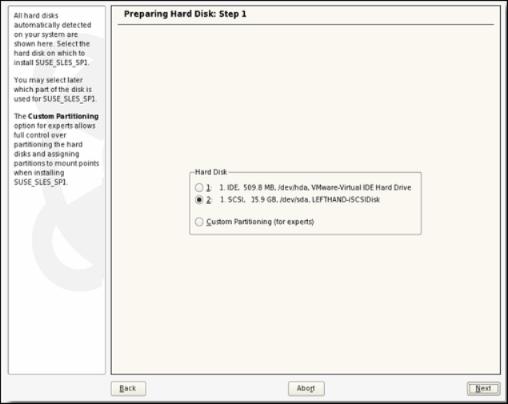
- On the Preparing Hard Disk: Step 1 page, select the iSCSI LUN as your hard disk and click Next.
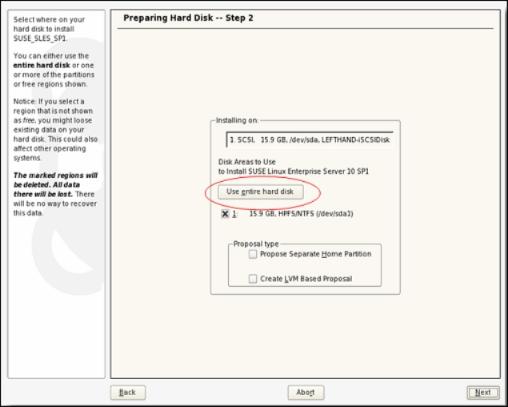
- On the Preparing Hard Disk: Step 2 page, click Use entire hard disk and click Next.
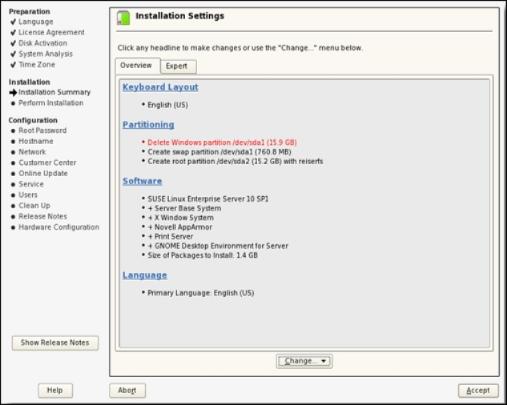
- On the Installation Settings page, review the installation settings and click Accept.
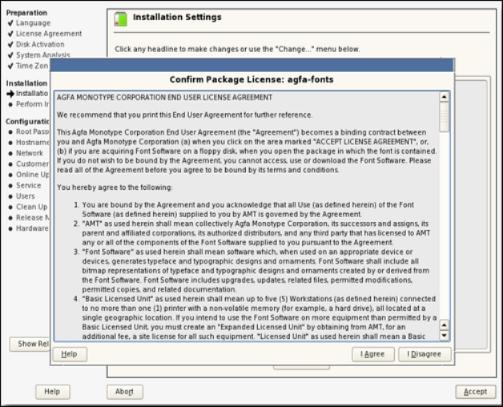
- On the Confirm Package License page, confirm the package license and click I Agree.
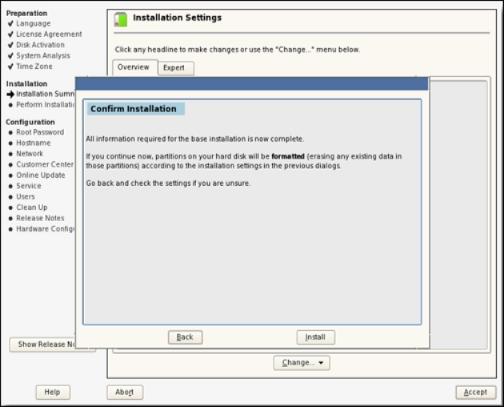
- On the Confirm Installation page, click Install.
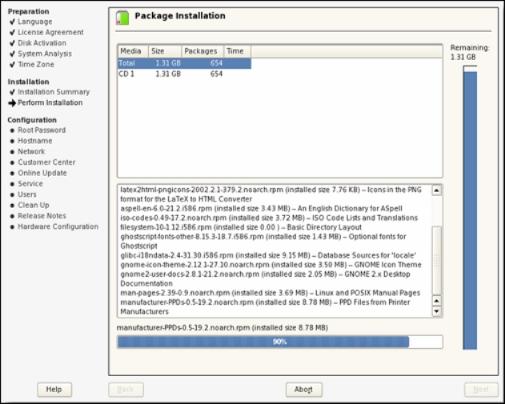
Installation of the packages begins. This process may take several minutes
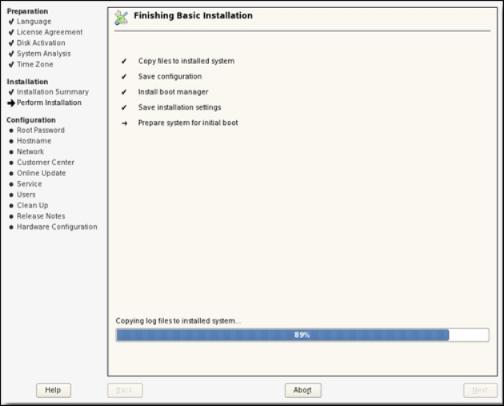
The installation will reboot upon completion.
After the machine reboots, let it boot from SAN.
When the system boots, you will be prompted to specify the administrator password.
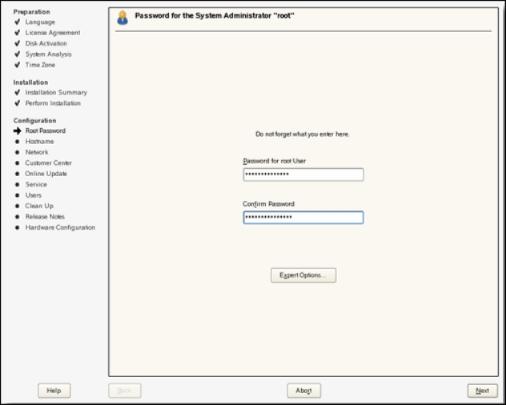
- On the Password for the System Administrator page, specify and confirm the password for the root user then click Next.
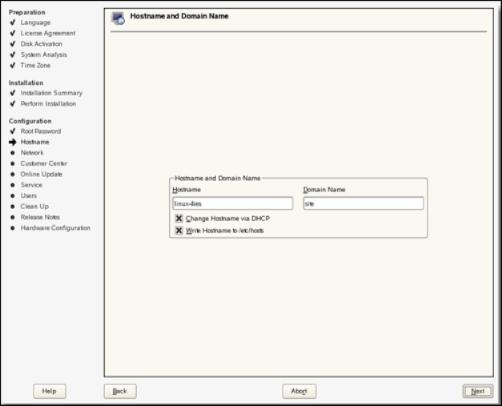
- On the Hostname and Domain Name page, specify the host name and domain name then click Next.
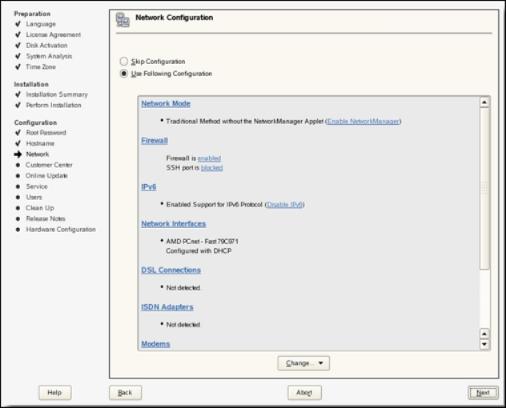
- On the Network Configuration page, review the network configuration and click Next.
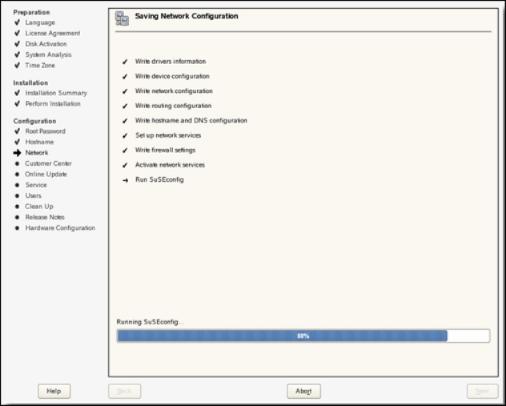
The network settings are saved.
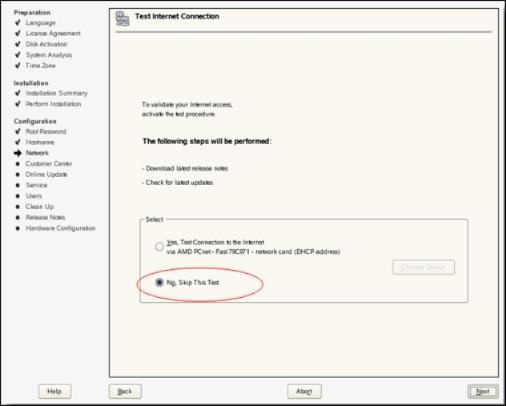
- On the Test Internet Connection page, select No, Skip This Test to skip testing the Internet Connection, then click Next.
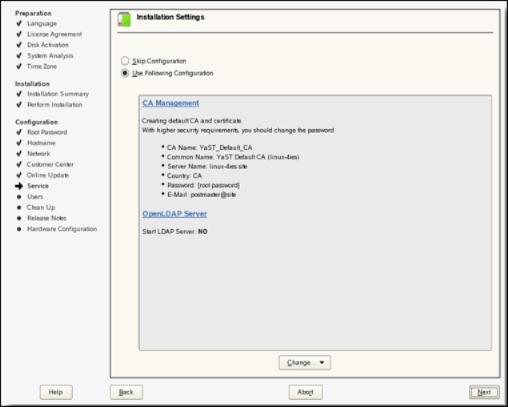
- On the Installation Settings page, review the installation settings and click Next.
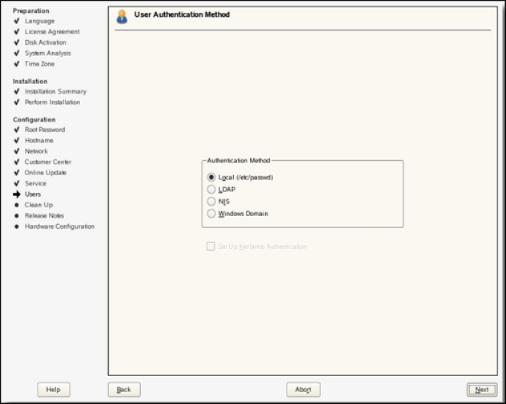
- On the User Authentication Method page, select an appropriate user authentication method and click Next.
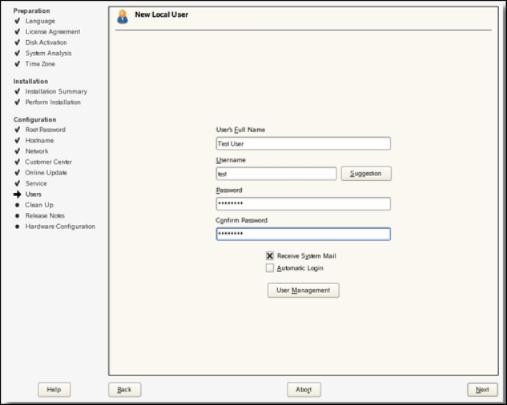
- On the New Local User page, create a new user then click Next.
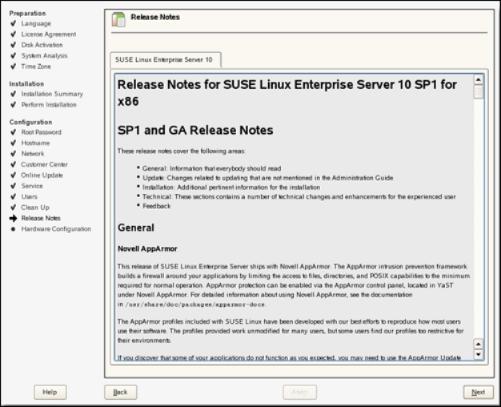
- On the Release Notes page, read the release notes then click Next.
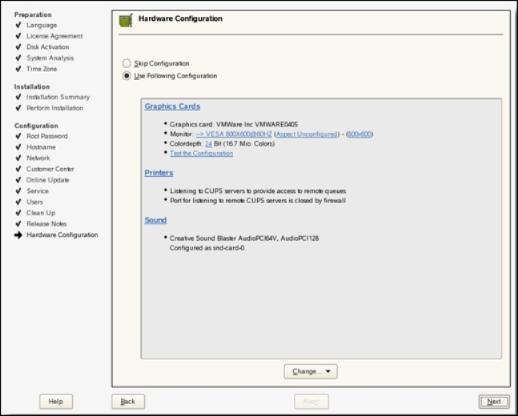
- On the Hardware Configuration page, review the hardware configuration and click Next.
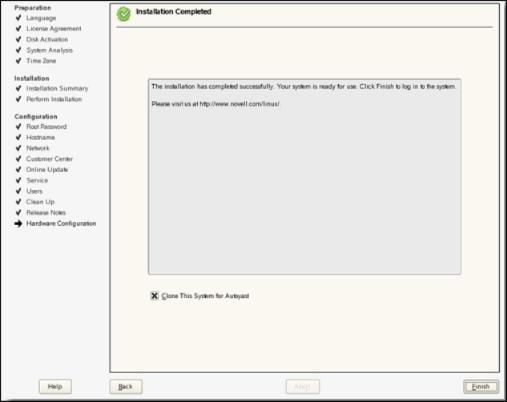
- On the Installation Completed page, click Finish.
The client will reboot and the log in page is displayed.
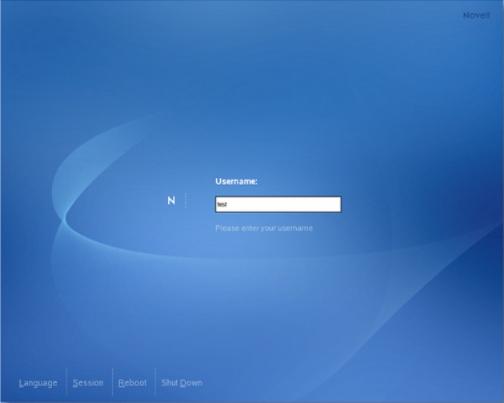
- Specify a valid user name and press Enter.
SUSE is ready to boot from iSCSI SAN.