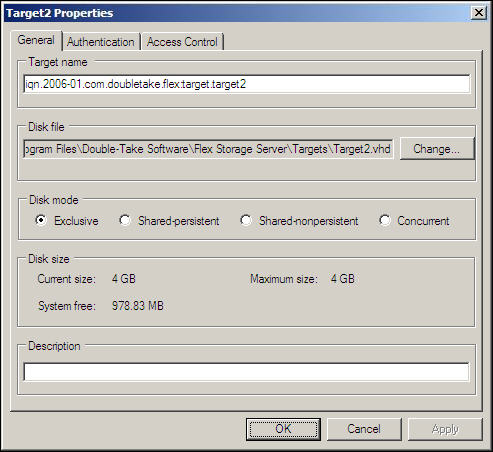
To configure the properties for a Flex Target, perform the following steps:
|
Property |
Description |
|---|---|
|
Target name |
The Flex Target name can be changed here. The default iSCSI Flex Target name prefix is a global option. In the preceding example, the default option is |
|
Disk file |
Use the Change button to point to a different disk file. UNC path values are supported, for example: \\ComputerName\SharedFolder\Resource.vhd The ComputerName may be an IP address or host name. |
|
Disk mode |
Select a disk mode for the Flex Target. Note: Before a disk can be set to either of the shared modes, it must be initialized, partitioned and formatted under exclusive mode and contain the basic data intended for usage prior to sharing. For detailed explanations about the disk modes, see the following sections: |
|
Disk size |
This is a read-only area that shows the current size, maximum size and amount of free space on the default drive used for storing target disk files. Current size and Maximum size may differ if all disk space was not allocated at time of disk creation. |
|
Description |
(optional) Specify a description for the Flex Target. |
|
Field |
Description |
|---|---|
|
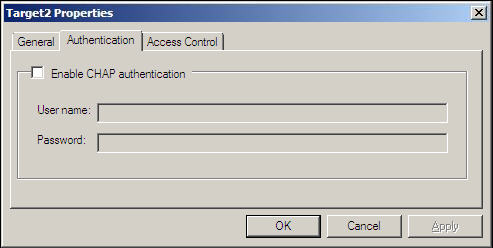
Enable CHAP authentication |
Select this checkbox to enable CHAP authentication. |
|
User name |
Specify the CHAP user name that corresponds to the Double-Take Flex Client that will boot from this Flex Target. |
|
Password |
Specify the CHAP password that corresponds to the Double-Take Flex Client that will boot from this Flex Target. |
| Note: |
If Access Control is enabled on a target with an empty Allowed IQN/IP list, no iSCSI initiator will be able to login to the target. That will effectively disable the target without removing it from Flex Storage server. |
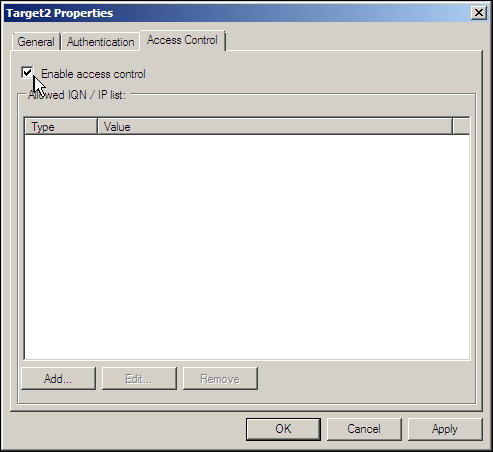

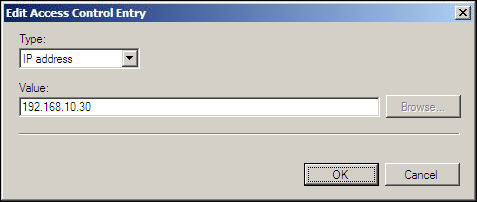
If you selected the IQN type, you can click Browse to browse for any iSCSI initiators that have recently attached or logged in to the Flex Storage Server.
| Note: |
When adding IP addresses to the allowed list, wildcards can be used to specify a range of IP addresses without entering them one by one. For example, Wildcards are not allowed for IQN identifiers. |