If you have not done so already, launch the Double-Take Availability for VMware Infrastructure console.
To set up protection for a virtual machine, click the Protect a virtual machine button to launch the protection workflow.
Expand the following sections for more information about each page in the Protect a virtual machine workflow.
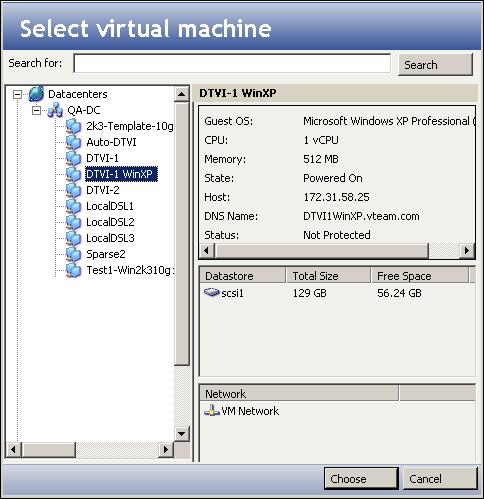
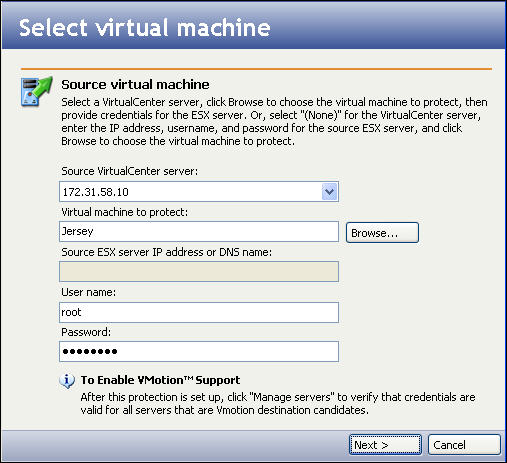
When you select Protect a virtual machine, the Select virtual machine page will appear.
Note: |
While generic SCSI device mappings in virtual machines are supported by Double-Take Availability for VMware Infrastructure, the generic SCSI device will not be created on the target virtual machine. This is necessary because the target virtual machine will fail to start if the SCSI device hardware does not exist on the target ESX host. Upon failback, the generic SCSI device will be mapped back to the original source. If a source virtual machine with a generic SCSI device mapping is replicated to target and the entire protection job is removed, then re-created in the reverse direction, the SCSI device will not be mapped back to the original source. |
Enter the following information for the source server:
To add additional VirtualCenter servers or to update credentials, see Managing VirtualCenter servers.
If you want to create a connection directly from one ESX server to another without using VirtualCenter, select (None).
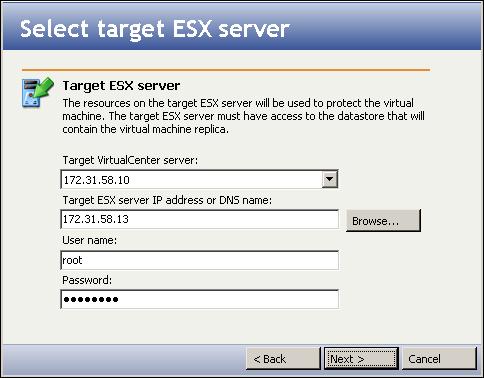
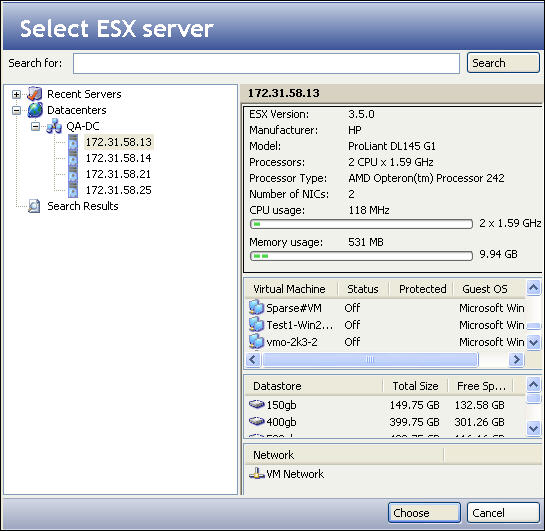
On the Select target ESX server window, you will enter information to select the target ESX server.
Enter the following information for the target server:
To add additional VirtualCenter servers or to update credentials, see Managing VirtualCenter servers.
Note: |
If there is a pre-existing virtual machine on the target datastore with same filename and directory structure as the source virtual machine that you are protecting, the protection job will overwrite the target virtual machine. |
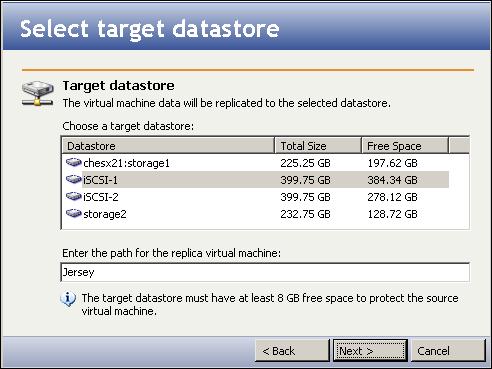
The data stores that are found on the target server will be added to the list on the Select target datastore window.
Note: |
Sufficient free space is determined by the following formula: Required space on source: Primary datastore free space > 256 MB * number of snapshot-capable disks Required space on target datastore: Datastore free space > Sum of all snapshot-capable disks sizes – amount of disk space used by pre-staged data |
Note: |
Do not use any special or unique characters in the replica virtual machine path, including the following: |
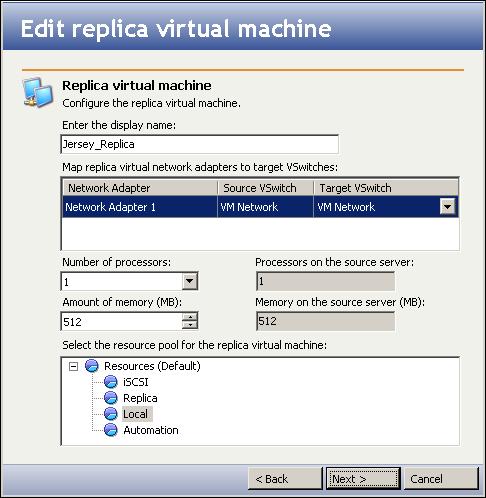
Select the options that will configure the replica virtual machine.
Note: |
Do not use any special characters in the replica virtual machine name, including the following: |
Note: |
The Processors on the source server field displays the number of processors on the original source virtual machine. |
Note: |
The Memory on the source server field displays the amount of memory (in MB) on the original source virtual machine. |
Note: |
The target virtual machine is registered on the first replication loop and will remain registered. To unregister a machine, you must click the Delete Protection button and choose the Delete the associated replica virtual machine option. Even though the target machine appears to be available on the ESX box, the target virtual machine should never be powered on, removed, or otherwise modified while it is owned by an active protection job. Doing so will corrupt the target virtual machine and break the protection job. |
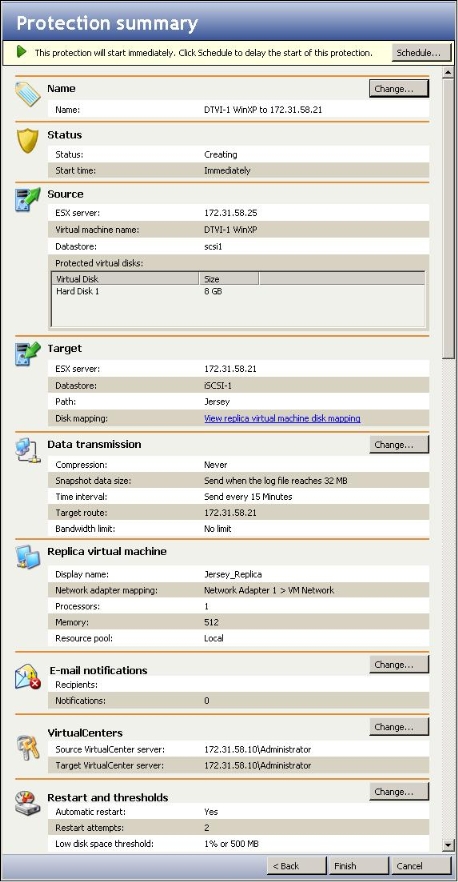
The first time you access the Protection summary page, it will be populated with default values that are recommended for a basic environment.
You can change protection settings for this job by clicking on the Change buttons.
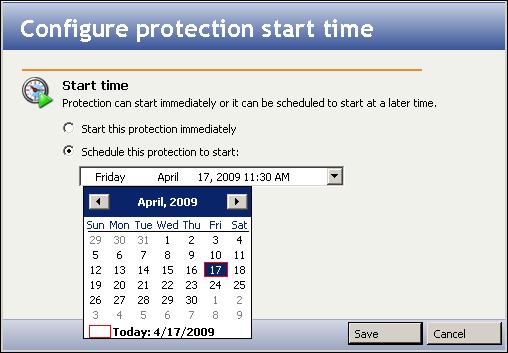
By default, Double-Take Availability for VMware Infrastructure starts the initial synchronization of a protection immediately after the protection is created.
If you want to specify a date and time in the future at which the initial synchronization will be started, click the Schedule button at the top of the window. The Configure protection start time window will appear.
Select the Schedule this protection to start option, then click the drop-down field to select a date from the calendar. Click on the time in the field to modify the start time.
If a protection job has not yet started, you can use this window to reschedule the job start time, cancel a future start time, or prompt for the job to start immediately.
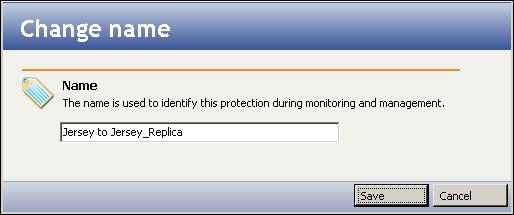
The protection name is a unique name that you can enter to identify the protected virtual machine and the target server with which it is associated. By default, the protection set is named <virtual machine name> to <target server name>.
Click the Change button in the Name area. The Change name window will appear.
Enter a name for the protection job. You might want to name it something like “source vm name to target”. When you are finished, click Save.
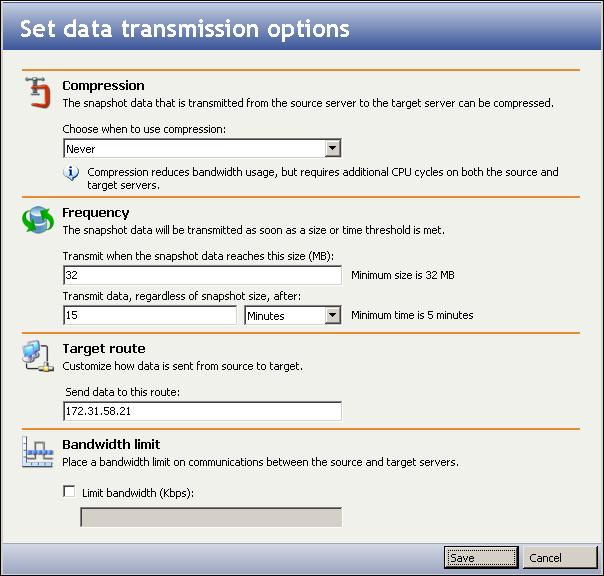
You can modify the data transmission options in order to make them more suitable for your environment.
Click the Change button in the Data Transmission area. The Set data transmission options window will appear.
Note: |
Enabling compression requires that additional CPU cycles be used on both the source and target servers. |
Note: |
A snapshot transmission cycle from the source to the target will begin when either of the threshold conditions are met: time or size. During the snapshot transmission cycle, the thresholds are not monitored. After the snapshot transmission cycle has completed, the application will again monitor these thresholds. If either of the thresholds were crossed during the snapshot transmission cycle, then a new transmission cycle will begin immediately. You may need to adjust the data transmission frequency options to optimize performance in your environment. Some factors you need to consider when adjusting these settings include the volume of write traffic in the virtual machine, the allowed data loss time period, and the cost to the virtual infrastructure. |
Note: |
If your ESX host is on multiple networks and has multiple addresses associated with those networks, you can choose to use an IP address other than the one you entered for the target in Selecting the target ESX server. This setting only applies to SCP routing and is not applicable to Double-Take Availability for VMware Infrastructure network communications. |
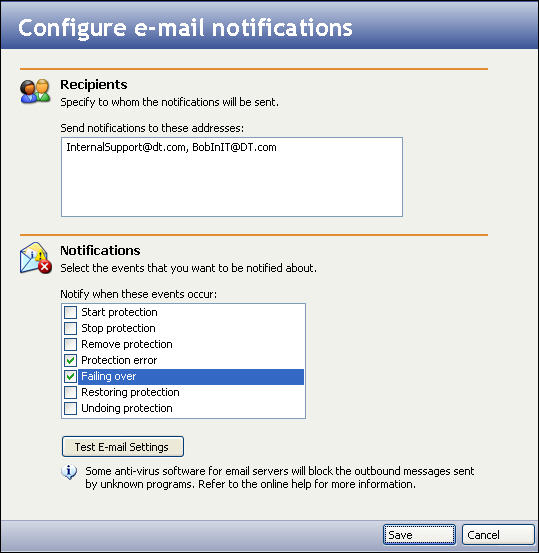
You can configure e-mail addresses and select the events that you want to trigger automatic e-mail alerts.
Click the Change button in the E-mail notifications area. The Configure e-mail notifications window will appear.
If you have not yet configured an e-mail server, a message will appear at the top of the window prompting you to set up the e-mail server. Click Configure to launch the Set up e-mail server window. For more information, see Managing the e-mail server.
Note: |
The e-mail server configuration will apply to all protection jobs. |
If you choose to disable e-mail notification for this protection job at a later time:
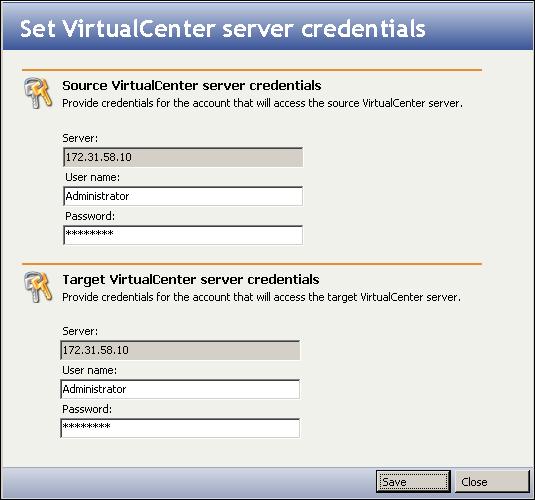
You can enter new credentials to be used when authenticating with VirtualCenter for this job.
Note: |
This area will not be available if you did not configure VirtualCenter servers for the source or target. For more information, see Managing VirtualCenter servers. Changes you make here will only apply to the current protection job. |
Click the Change button in the VirtualCenter credentials area. The Set VirtualCenter server credentials window will appear.
Enter the following information in the appropriate fields:
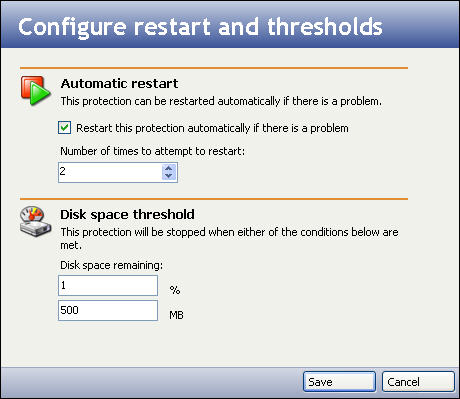
Click the Change button in the Restart and Thresholds area. The Configure restart and thresholds window will appear.
Note: |
You can change the interval at which auto-restarts are attempted. For more information, see Configuring advanced options. |
Review the protection settings on the Protection summary page.
If the settings are acceptable, click Finish to save your protection settings.
After your protection has been configured, you will be able to monitor the protection status of your virtual machine(s). See Monitoring protected virtual machines.
Note: |
While using Double-Take Availability for VMware Infrastructure, you should not attempt to manually create or delete snapshots on the protected virtual machine. Doing so will disrupt the protection of the virtual machine and may generate unpredictable results on the source and target virtual machines. |
Next step: Monitoring protected virtual machines