You are here: Workload protection > Virtual machine protection > Protect an entire physical or virtual machine using an ESX virtual machine > Setting protection options for virtual ESX target workloads

Setting protection options

If you have not done so already, launch the Double-Take Availability Virtual Recovery Assistant console.

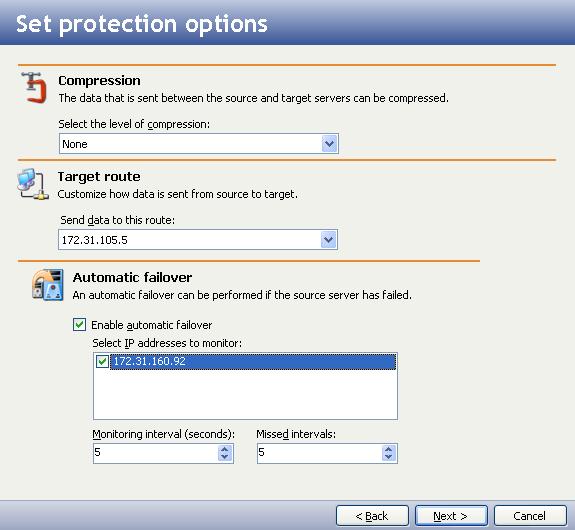
Select the options you want to use during protection.

  1. Compression—Select the compression level (None, Low, Medium, or High) to use when sending data from the source to target server.
  2. Target route—Select the IP address on the target server to which you want to send data.

Note:

If your host is on multiple networks and has multiple addresses associated with those networks, you can choose to use an IP address other than the one you entered for the target in Select a target server.

  1. Enable automatic failover—If you want the replica virtual machine to stand in for the source server when the source is inaccessible, select this checkbox.

Note:

If automatic failover is enabled and a failover condition is met before the initial mirror has completed, Virtual Recovery Assistant will attempt to failover to the target virtual machine. To prevent potential issues, all protection jobs should be configured to use manual failover until the initial mirror is complete.

  1. IP address to monitor for automatic failover—Select the IP address to monitor for automatic failover.
  2. Monitoring interval (seconds)—(Default = 5) Select how often the monitor will check the source machine availability.
  3. Missed intervals—(Default = 5) Select how many monitor replies can be missed before assuming the source machine has failed.
  4. When you have finished setting protection options, click Next. The Protection Summary pane will appear.
  1. Review the protection options, then click Finish to initiate the protection process.

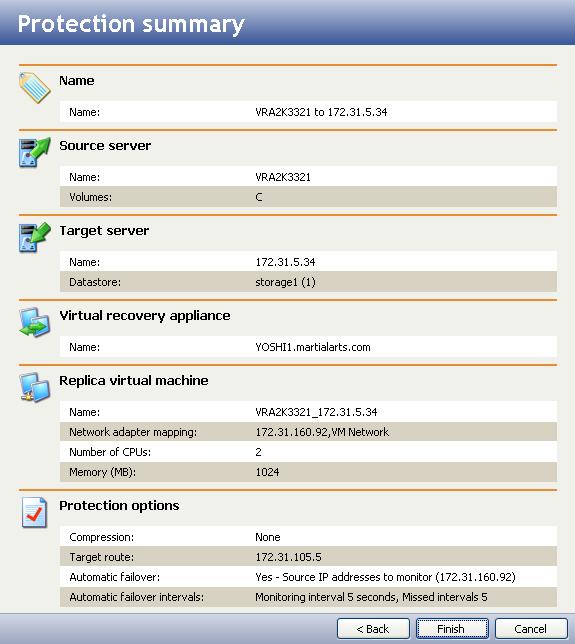
When you click Finish, a message box will appear identifying the status of the protection check.

Next step: Monitor protection

Related Topics