You are here: Workload protection > Cluster protection > Protecting a standard cluster

Protecting a standard cluster

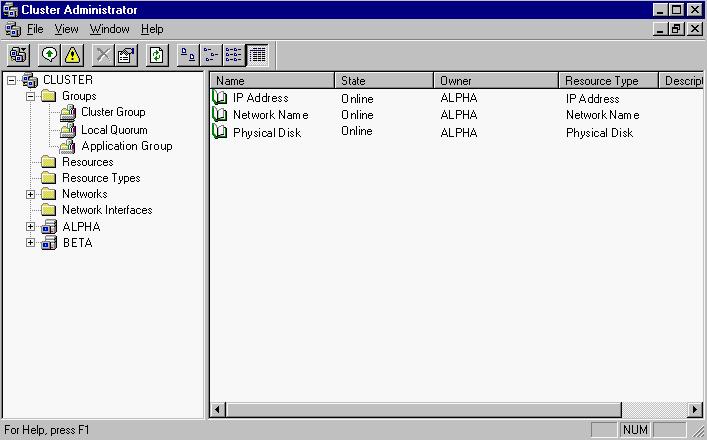
Use the following steps to protect a standard cluster, where a single copy of data resides on a SCSI disk that is shared between cluster nodes. You will be using the Double-Take Source Connection cluster resource to protect your standard cluster.

  1. If your source is a cluster, create a virtual server (including resources for an IP address, network name, and physical disk) on the source cluster. With this configuration, users will access their data from the source cluster, regardless of which node is currently in control. MSCS will handle failover between the nodes of the cluster. Double-Take Availability will handle failover between the source cluster and the target (cluster or standalone). See your Microsoft documentation if you need assistance creating a virtual server on the source cluster.

  1. If your target is a cluster, create a virtual server (including resources for an IP address, network name, and physical disk) on the target cluster. With this configuration, if there is a source failure, the data will be available for the users from the target cluster, regardless of which node is currently in control. MSCS will handle failover between the nodes of the target cluster. Double-Take Availability will handle failover between the source (cluster or standalone) and the target cluster. See your Microsoft documentation if you need assistance creating a virtual server on the target cluster.
  2. On your source, create a replication set from the Replication Console.
  3. Note:

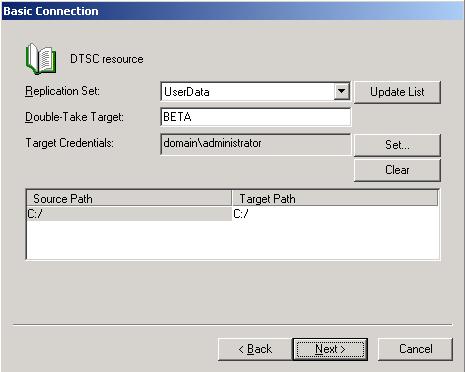
    If your source is a cluster, you need to create the replication set on the node which currently owns the group with the virtual server you want to protect.

  1. Open the Replication Console.
  2. Right-click the source in the left pane of the Replication Console and select New, Replication Set.
  3. A replication set icon appears in the left pane under the source. By default, it is named New Replication Set. Rename the newly inserted replication set with a unique name by typing over the default name and pressing Enter. This process is similar to naming a new folder in Windows Explorer.
  4. Expand the tree under the replication set name to view the volume and directory tree for the source.
  5. Note:

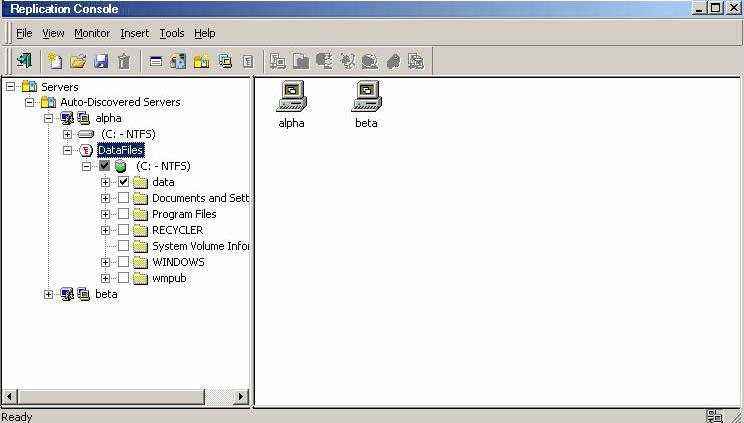
    The default number of files that are listed in the right pane of the Replication Console is 2500, but this is user configurable. A larger number of file listings allows you to see more files in the Replication Console, but results in a slower display rate. A smaller number of file listings displays faster, but may not show all files contained in the directory. To change the number of files displayed, select File, Options and adjust the File Listings slider bar to the desired number.

    To hide offline files, such as those generated by snapshot applications, select File, Options and disable Display Offline Files. Offline files and folders are denoted by the arrow over the lower left corner of the folder or file icon.

  6. Identify the data on the source associated with the group that you want to protect by selecting volumes, drives, directories, and/or specific files. Be sure and verify what files can be included in your replication set.

  1. After selecting the data for this replication set, right-click the new replication set icon and select Save. A saved replication set icon will change from red to black.
  1. If your source is a cluster, you need to create a duplicate replication set on each of the other nodes in the cluster. Because the other nodes do not currently own the files, you will not be able to browse to select the data like you did on the first node. Therefore, you will have to manually enter the replication set data.
  2. Note:

    As an alternative to the following manual steps, you can stop the Double-Take service on the other nodes of the source cluster, copy the file DblTake.db from the first node to the other nodes, and then restart the Double-Take service.

  1. Right-click the replication set created on the owning node and select Properties.

  1. Record the exact drive and directories of each path displayed, including where the rule is included or excluded and if recursion is applied.
  2. Right-click a non-owning node and select New, Replication Set.
  3. Enter the exact, case-sensitive name for the replication set as specified on the owning node and press Enter.
  4. Right-click the replication set that you just created and select Properties.
  5. Click Add.
  6. Enter the exact same replication set rules you recorded from the owning node. Be sure and mark the correct Include, Exclude and Recurse sub-directories options that need to be applied.
  7. Note:

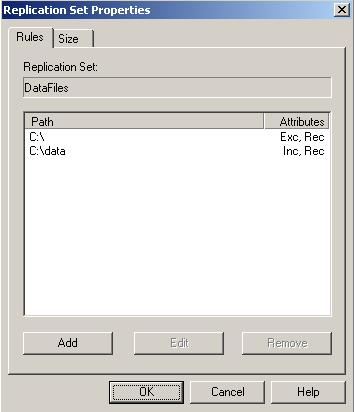
    Each replication set rule on the non-owning nodes must be identical to the replication set rule on the owning node.

  1. After entering all of the replication set rules, save the replication set. The replication set rules will be saved even though the non-owning nodes do not have access to the locations right now. The rules will function properly when the node becomes an owner.
  1. On your cluster (source and/or target), you need to disable the standard Double-Take Availability connection controls so that the MSCS resource that you will be configuring later can control the Double-Take Availability connections.
  1. In the Replication Console, right-click a node of the source cluster and select Properties.
  2. Select the Setup tab.

  1. By default, the Automatically Reconnect During Source Initialization check box will be selected. Disable this option by clearing the check box.
  2. Click OK to save the changes.
  3. Repeat these steps on each node of the cluster(s).
  1. If your source is a standalone server, establish your connection through the Connection Manager, selecting the virtual server network name for the Target Server and the virtual server IP address for the Route.
  2. If your source is a cluster, establish your connection by creating and bringing online a Double-Take Source Connection resource. These instructions will vary depending on your operating system.
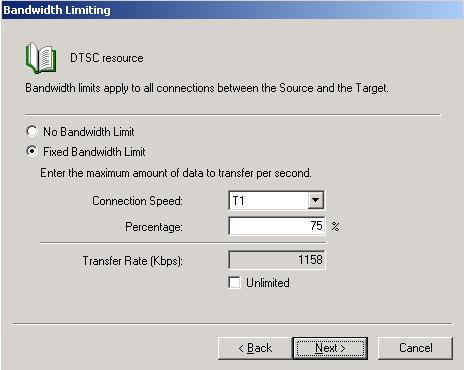
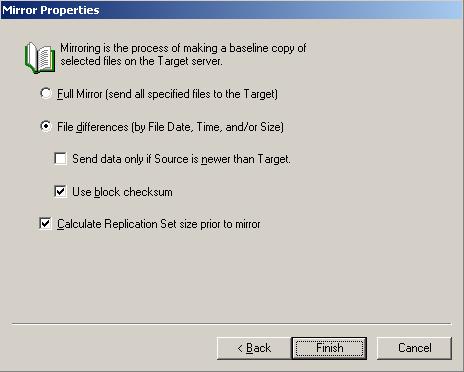
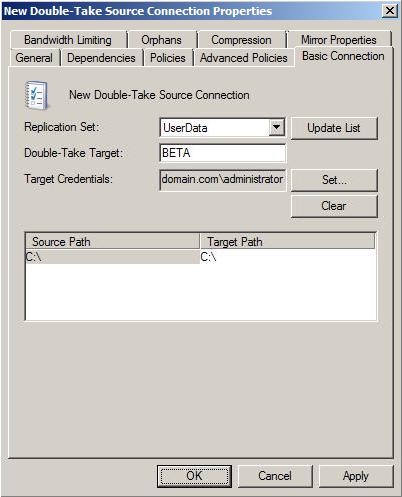
Establishing your connection on Windows 2003
Establishing your connection on Windows 2008
  1. Bring the Double-Take Source Connection resource and the virtual server resources online.