The Double-Take Flex winMigr8™ utility offers the ability to migrate an existing iSCSI boot disk for use on a different system with potentially different hardware. One of the benefits of winMigr8 is that migrated images will continue to work for the original Flex Client system.
On the system that you are intending to iSCSI boot from, boot it using the Client Deployment Tool (see Client Deployment Tool).
The Client Deployment Tool wizard is displayed.
On the Welcome page, click Next.

On the Specify iSCSI Boot Network Adaptor page, select the iSCSI boot network adapter to use, then click Next.
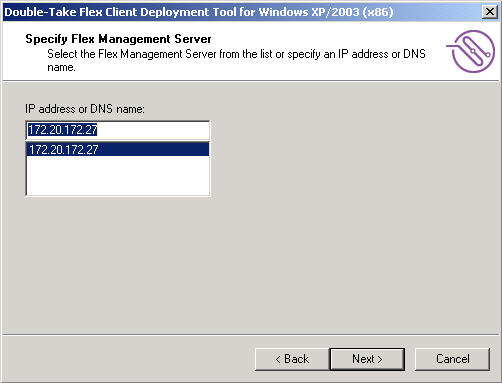
On the Specify Flex Management Server page, select or specify the IP address of the Double-Take Flex Management Server, then click Next.
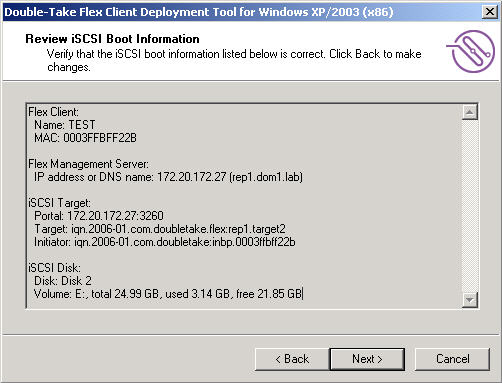
On the Review iSCSI Boot Information page, verify the parameters you selected, then click Next.
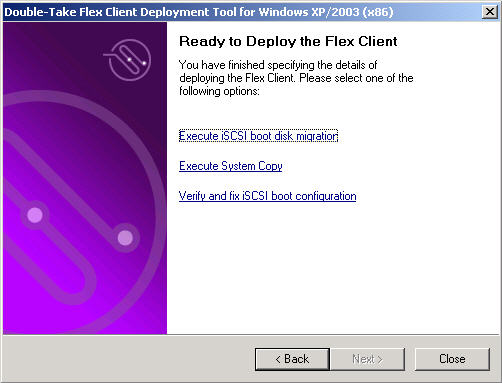
On the Ready to Deploy the Flex Client page, select Execute iSCSI boot disk migration.
The following window is displayed.

winMigr8 attempts to automatically identify the drive containing the iSCSI target by searching an existing Windows installation on the mounted iSCSI target. When winMigr8 finds the iSCSI boot NIC driver, the OS release and version are displayed below the Windows installation directory text box.
You can also click Browse to navigate to the Windows installation directory on the mounted iSCSI target.
|
Note: |
Naming the volume at the time of creation will make proper identification of the iSCSI target boot volume easier. |
The migration proceeds.
After the migration is complete and the new system is rebooted (from iSCSI SAN), Windows will auto-detect and prompt you if any drivers need to be installed. Double-Take recommends that you use the drivers that were installed during the migration process to update the NIC drivers.