
|
|
Use these instructions to create a files and folders job.
Note the following information concerning cluster scenarios.
Give the target cluster account full control over the source file server account in Active Directory and over the source file server DNS record.
If control of the DNS record is not added, the Client Access Point will fail name resolution and you will not be able to create the target shares unless the record is manually updated.
Click Get Started from the toolbar.
Select Double-Take Availability and click Next.
Select Protect files and folders, an application, or an entire Windows server and click Next.
Choose your source server. This is the server that contains the files and folders that you want to protect.

If you enter the source server's fully-qualified domain name, the Double-Take Console will resolve the entry to the server short name. If that short name resides in two different domains, this could result in name resolution issues. In this case, enter the IP address of the server.
When specifying credentials for a new server, specify a user that is a member of the local Double-Take Admin and local administrator security groups. Ideally, you should use a local account rather than a domain account because the domain account will fail to authenticate while failed over if the NETBIOS name and/or SPNs are failed over. If you want Double-Take to update DNS during failover, the account must be a member of the Domain Admins group.
To best prepare for a potential failover, restore, and failback scenario, you may want to use a source server that has been inserted into the console by a private IP address. In this scenario, your source must have at least two IP addresses, one for public communication and one for private. If you insert your source in the console using the private IP address, then that private IP address can more easily be used after a failure to restore the data that changed during failover from the target back to the source. If your source server has already been inserted into the console by name, you can remove it and reinsert it by private IP address on the Manage Servers page.
Choose the type of workload that you want to protect. Under Server Workloads, in the Workload types pane, select Files and Folders. In the Workload items pane, you will see the volumes and shares (if any) for your source, or if you are protecting a cluster, you will see your cluster groups. Select the volumes, shares, or cluster groups that you want to protect.
If the workload you are looking for is not displayed, enable Show all workload types. The workload types in gray text are not available for the source server you have selected. Hover your mouse over an unavailable workload type to see a reason why this workload type is unavailable for the selected source.
To select your files and folders in more detail, click the Replication Rules heading and expand the volumes under Folders.

Volumes and folders with a green highlight are included in their entirety in the
If you need to remove a rule, highlight it in the list at the bottom and click Remove Rule. Be careful when removing rules. Double-Take may create multiple rules when you are adding directories. For example, if you add E:\Data to be included in protection, then E:\ will be excluded. If you remove the E:\ exclusion rule, then the E:\Data rule will be removed also.
If you return to this page using the Back button in the job creation workflow, your Workload Types selection will be rebuilt, potentially overwriting any manual replication rules that you specified. If you do return to this page, confirm your Workload Types and Replication Rules are set to your desired settings before proceeding forward again.
Choose your target server. This is the server that will store the replica data from the source.
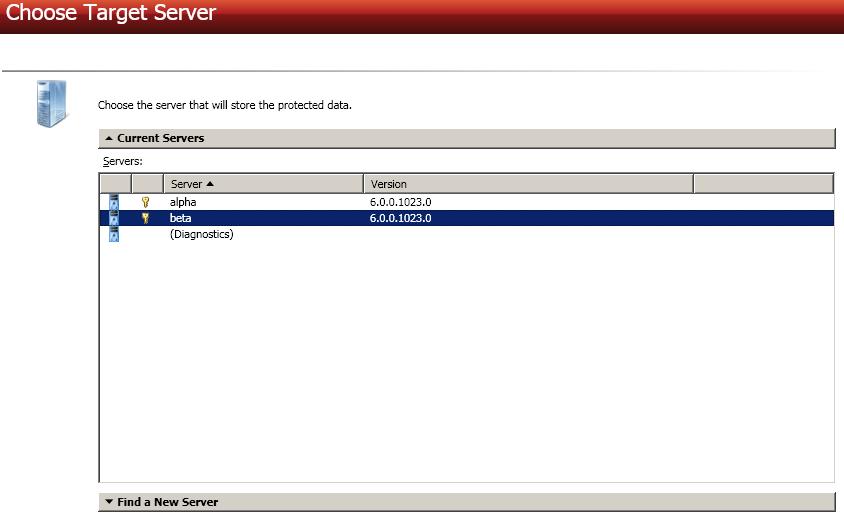
If you enter the target server's fully-qualified domain name, the Double-Take Console will resolve the entry to the server short name. If that short name resides in two different domains, this could result in name resolution issues. In this case, enter the IP address of the server.
When specifying credentials for a new server, specify a user that is a member of the local Double-Take Admin and local administrator security groups. Ideally, you should use a local account rather than a domain account because the domain account will fail to authenticate while failed over if the NETBIOS name and/or SPNs are failed over. If you want Double-Take to update DNS during failover, the account must be a member of the Domain Admins group.
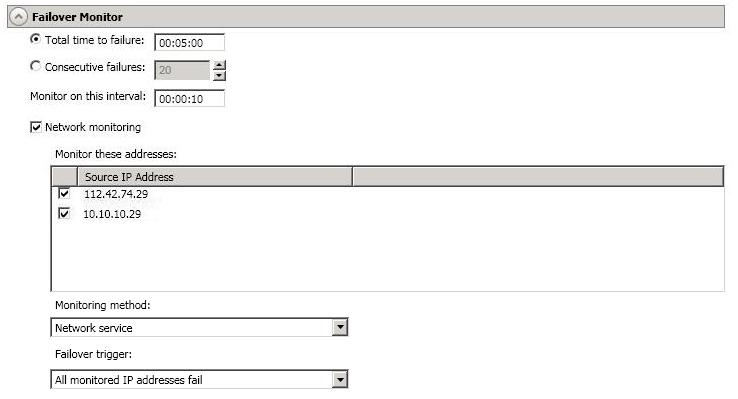
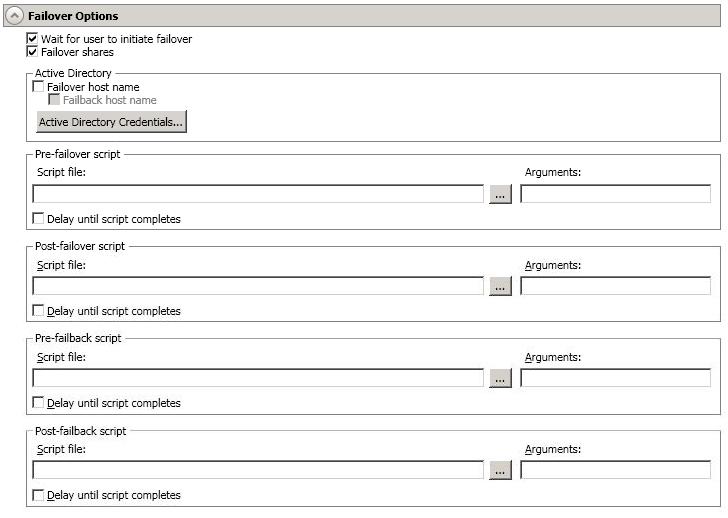
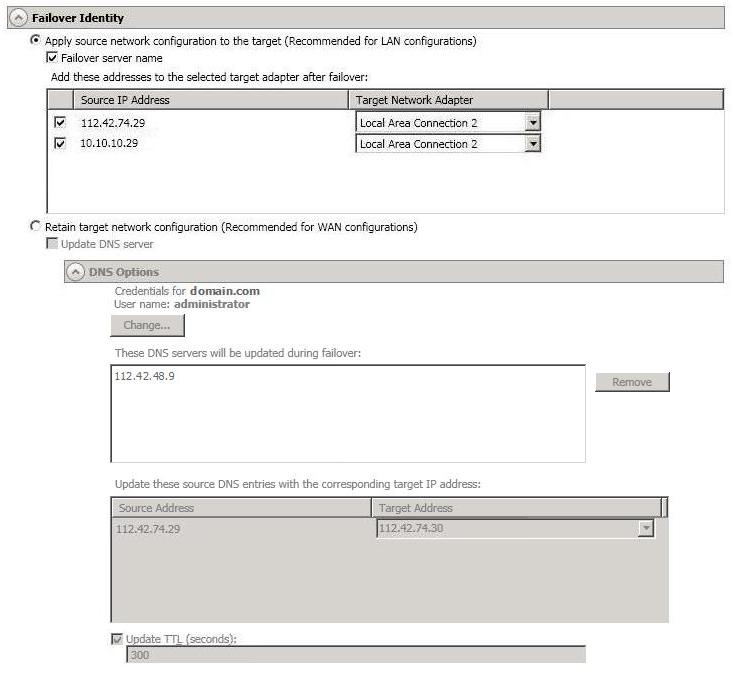
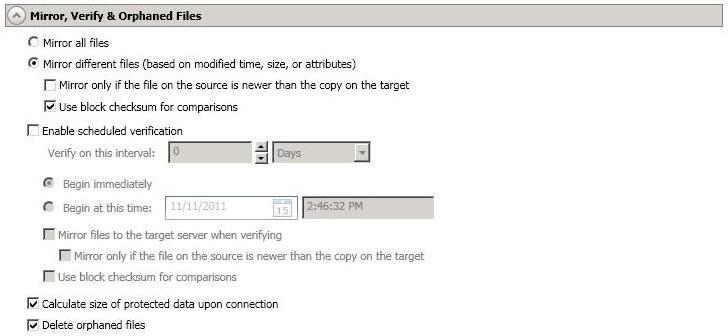
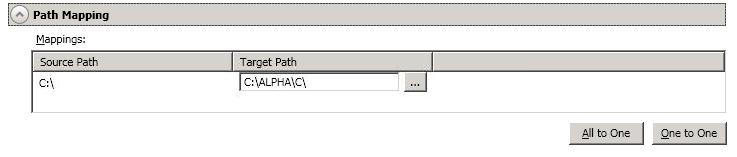
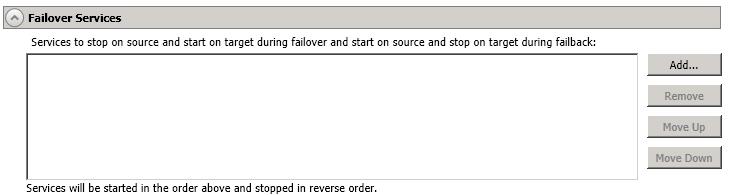
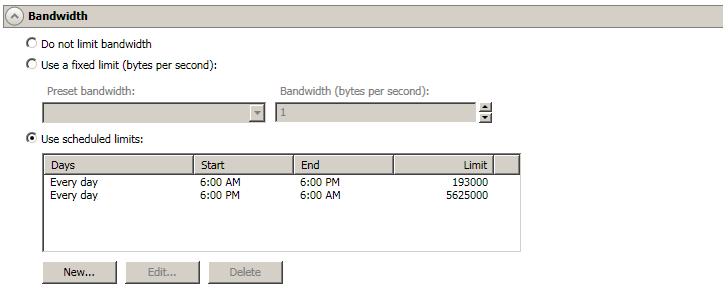
You have many options available for your files and folders job. However, not all of the options will be applicable to clustered environments. Configure those options that are applicable to your environment.
Click a link below to see the options available for that section of the Set Options page.
Double-Take validates that your source and target are compatible. The Summary page displays your options and validation items.
Errors are designated by a white X inside a red circle. Warnings are designated by a black exclamation point (!) inside a yellow triangle. A successful validation is designated by a white checkmark inside a green circle. You can sort the list by the icon to see errors, warnings, or successful validations together. Click on any of the validation items to see details. You must correct any errors before you can enable protection. Depending on the error, you may be able to click Fix or Fix All and let Double-Take correct the problem for you. For those errors that Double-Take cannot correct automatically, you will need to modify the source or target to correct the error, or you can select a different target. You must revalidate the selected servers, by clicking Recheck, until the validation check passes without errors.
Before a job is created, the results of the validation checks are logged to the Double-Take Management Service log on the target.
Once your servers have passed validation and you are ready to establish protection, click Finish, and you will automatically be taken to the Manage Jobs page.
If your target is a cluster, a cluster resource named DTTargetRes_FilesAndFolders_GUID will be created in the target cluster group that contains the disk where data is being replicated from the source. If the target cluster group that contains the DTTargetRes_FilesAndFolders_GUID resource is moved to a different node, an auto-disconnect and reconnect will occur, and a re-mirror will be initiated.
If you are using a standalone to cluster configuration, the Failover button on the Manage Jobs page will be enabled once a mirror is complete. Do not failover as unexpected results may occur. Failover is not supported for standalone to cluster configurations.
 General


 Related Topics