
|
Use these instructions to create an Exchange job.
Click Get Started from the toolbar.
Select Double-Take Availability and click Next.
Select Protect files and folders, an application, or an entire Windows server and click Next.
Choose your source server. This is the physical or virtual server running Exchange.

If you enter the source server's fully-qualified domain name, the Double-Take Console will resolve the entry to the server short name. If that short name resides in two different domains, this could result in name resolution issues. In this case, enter the IP address of the server.
When specifying credentials for a new server, specify a user that is a member of the local Double-Take Admin and local administrator security groups. If desired, the user must also meet the following credentials requirements, however, you can specify a separate user later in the job creation process to handle the Exchange specific tasks.
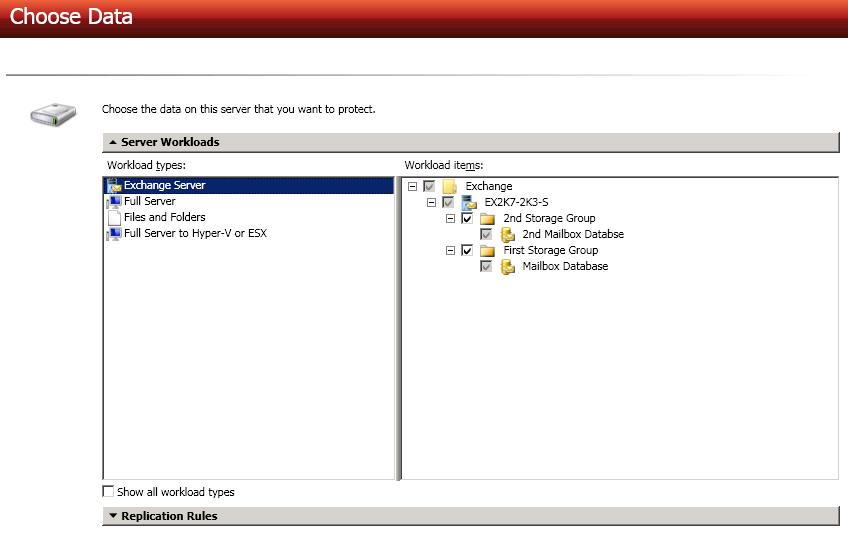
Choose the type of workload that you want to protect. Under Server Workloads, in the Workload types pane, select Exchange Server. In the Workload items pane, Double-Take will automatically select the entire Exchange program and data files.
If the workload you are looking for is not displayed, enable Show all workload types. The workload types in gray text are not available for the source server you have selected. Hover your mouse over an unavailable workload type to see a reason why this workload type is unavailable for the selected source.

If you want to select other files and folders to include in your protection, click the Replication Rules heading and expand the volumes under Folders. For example, if you need to protect data that is stored on a non-mailbox server role, for example SMTP queue data, you will need to configure protection for that data separately.
Volumes and folders with a green highlight are included in their entirety in the
If you need to remove a rule, highlight it in the list at the bottom and click Remove Rule. Be careful when removing rules. Double-Take may create multiple rules when you are adding directories. For example, if you add E:\Data to be included in protection, then E:\ will be excluded. If you remove the E:\ exclusion rule, then the E:\Data rule will be removed also.
If you return to this page using the Back button in the job creation workflow, your Workload Types selection will be rebuilt, potentially overwriting any manual replication rules that you specified. If you do return to this page, confirm your Workload Types and Replication Rules are set to your desired settings before proceeding forward again.
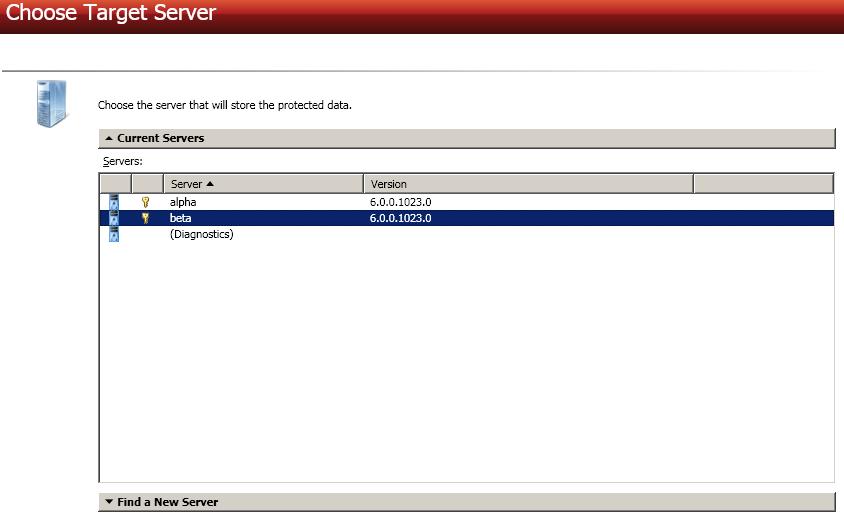
Choose your target server. This is the server that will store the replica Exchange Server from the source.

If you enter the target server's fully-qualified domain name, the Double-Take Console will resolve the entry to the server short name. If that short name resides in two different domains, this could result in name resolution issues. In this case, enter the IP address of the server.
When specifying credentials for a new server, specify a user that is a member of the local Double-Take Admin and local administrator security groups. If desired, the user must also meet the following credentials requirements, however, you can specify a separate user later in the job creation process to handle the Exchange specific tasks.
You have many options available for your Exchange job. Configure those options that are applicable to your environment.
Click a link below to see the options available for that section of the Set Options page.
Double-Take validates that your source and target are compatible. The Summary page displays your options and validation items.
Errors are designated by a white X inside a red circle. Warnings are designated by a black exclamation point (!) inside a yellow triangle. A successful validation is designated by a white checkmark inside a green circle. You can sort the list by the icon to see errors, warnings, or successful validations together. Click on any of the validation items to see details. You must correct any errors before you can enable protection. Depending on the error, you may be able to click Fix or Fix All and let Double-Take correct the problem for you. For those errors that Double-Take cannot correct automatically, you will need to modify the source or target to correct the error, or you can select a different target. You must revalidate the selected servers, by clicking Recheck, until the validation check passes without errors.
Before a job is created, the results of the validation checks are logged to the Double-Take Management Service log on the target.
Once your servers have passed validation and you are ready to establish protection, click Finish, and you will automatically be taken to the Manage Jobs page.