Use these instructions to create a V to ESX job.
-
Click Get Started from the toolbar.
-
Select Double-Take Availability and click Next.
-
Select Protect multiple Windows virtual servers on ESX with a Windows Virtual Recovery Appliance and click Next.
-
Choose your source server. This is the ESX host that contains the virtual servers that you want to protect.
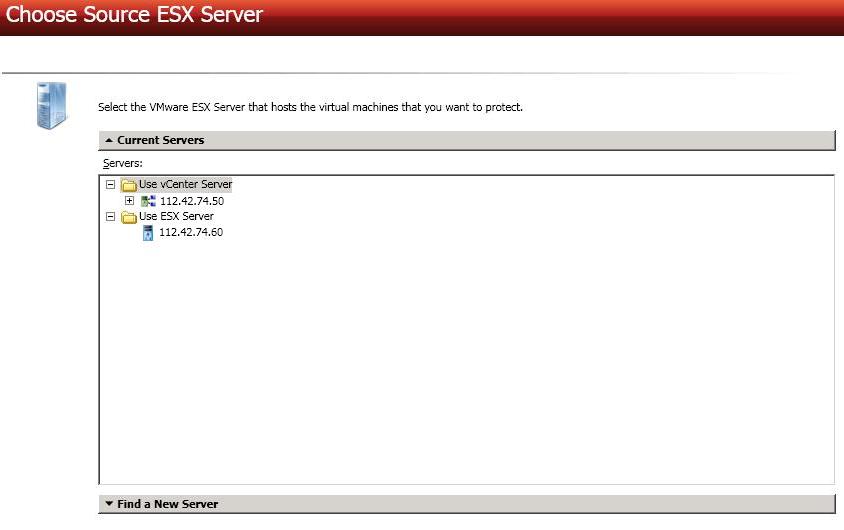
- Current Servers—This list contains the vCenter and ESX servers currently available in your console session. Select your ESX server from the list.
- Find a New Server—If the server you need is not in the Current Servers list, click the Find a New Server heading.
- VirtualCenter Server—Select your vCenter server from the list. If your vCenter server is not in the list, click Add VirtualCenter Server, specify the server and valid credentials, and click Add. If you are not using vCenter, select None.
- ESX Server—Specify the name or IP address of the ESX server.
- User name—This field will only be available if you are not using vCenter. In this case, specify the root user or another user that has the administrator role on the specified ESX server.
- Password—Specify the password associated with the User name you entered.
-
Click Next to continue.
-
Select the virtual servers on your source that you want to protect. Virtual machines that are suspended or powered off, or those that do not have a valid operating system according to ESX will not be available for selection. A separate job will be created for each source that you select for protection.
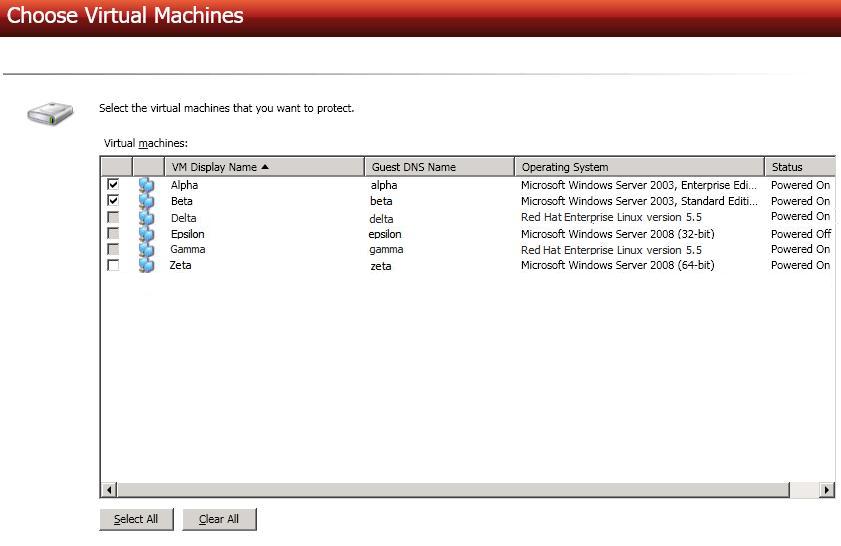
Each source can have no more than ten NICs enabled.
-
Click Next to continue.
-
Choose the ESX server where your target virtual recovery appliance is located.
This is also the server where your replica virtual machine will be located.
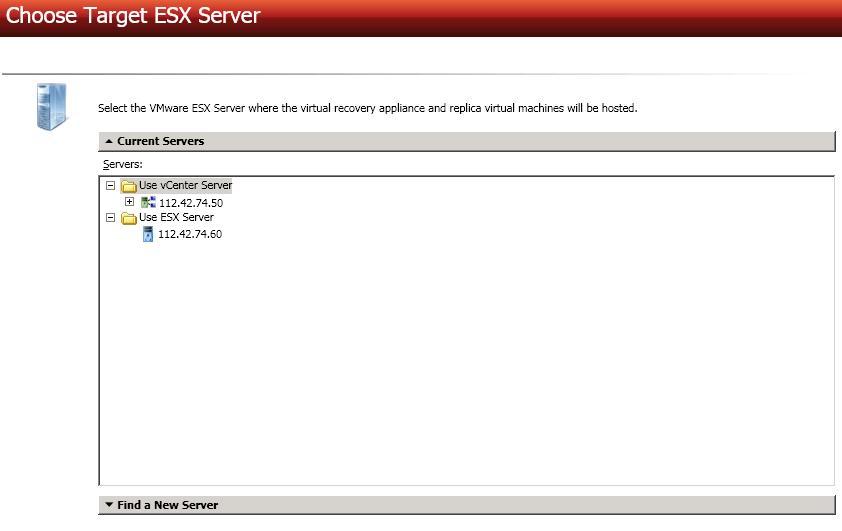
- Current Servers—This list contains the vCenter and ESX servers currently available in your console session. Select your ESX server from the list.
- Find a New Server—If the server you need is not in the Current Servers list, click the Find a New Server heading.
- VirtualCenter Server—Select your vCenter server from the list. If your vCenter server is not in the list, click Add VirtualCenter Server, specify the server and valid credentials, and click Add. If you are not using vCenter, select None.
- ESX Server—Specify the name or IP address of the ESX server.
- User name—This field will only be available if you are not using vCenter. In this case, specify the root user or another user that has the administrator role on the specified ESX server.
- Password—Specify the password associated with the User name you entered.
-
Click Next to continue.
-
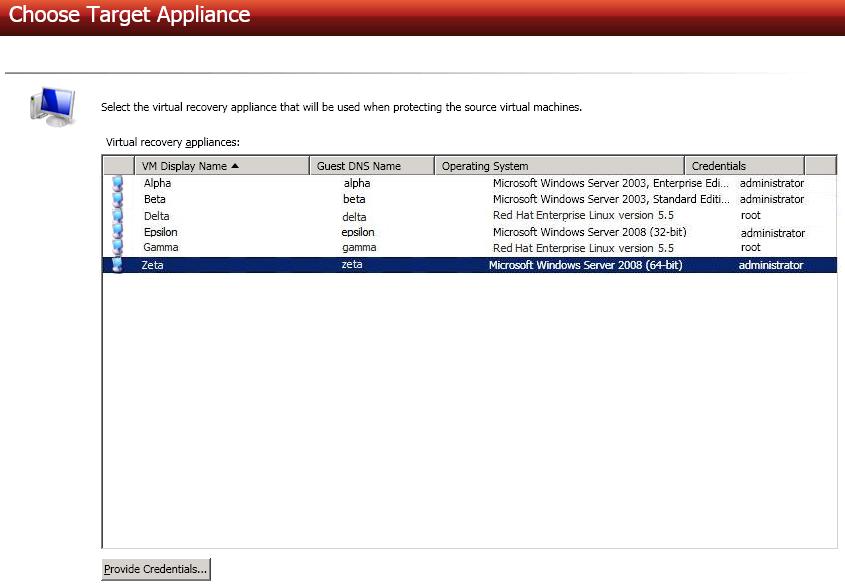
Choose your virtual recovery appliance on your target ESX server. Only valid virtual recovery appliances will be displayed in the list. If necessary, click Provide Credentials and specify a valid user on the virtual recovery appliance you have selected. The user must be a member of the local Double-Take Admin and local administrators security groups. See V to ESX requirements for details on the virtual recovery appliance.
-
Click Next to continue.
-
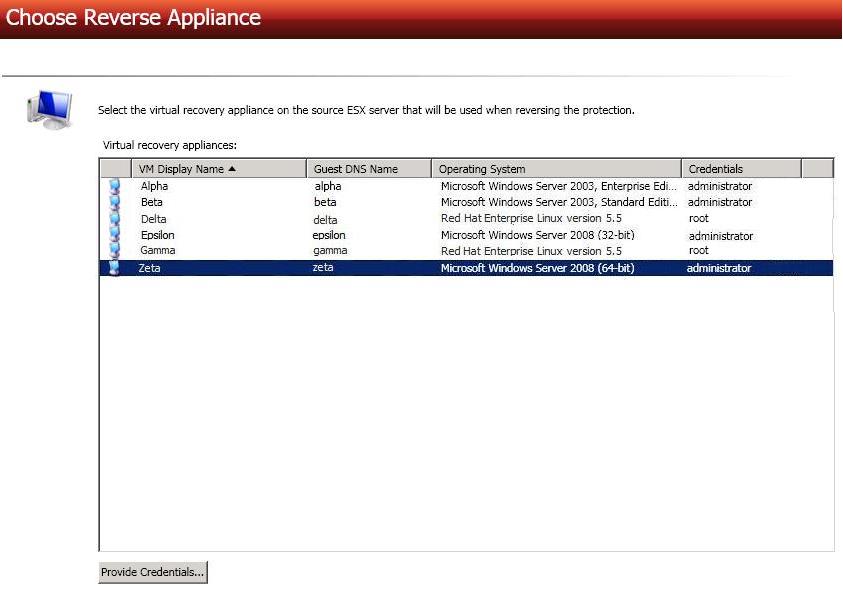
If desired, select a virtual recovery appliance on your source ESX server. This
appliance will be used during the reverse process, allowing you to protect the
source replica virtual server on the target back to the original source ESX host. If
necessary, click Provide Credentials and specify a valid user on the virtual
recovery appliance you have selected. The user must be a member of the Double-Take Admin security group. You can skip this step and select a reverse appliance
after the job has been created, however, you must have a reverse appliance
selected before failover. See V to ESX requirements for details on the virtual recovery appliance.
-
Click Next to continue.
-
Select your protection options.
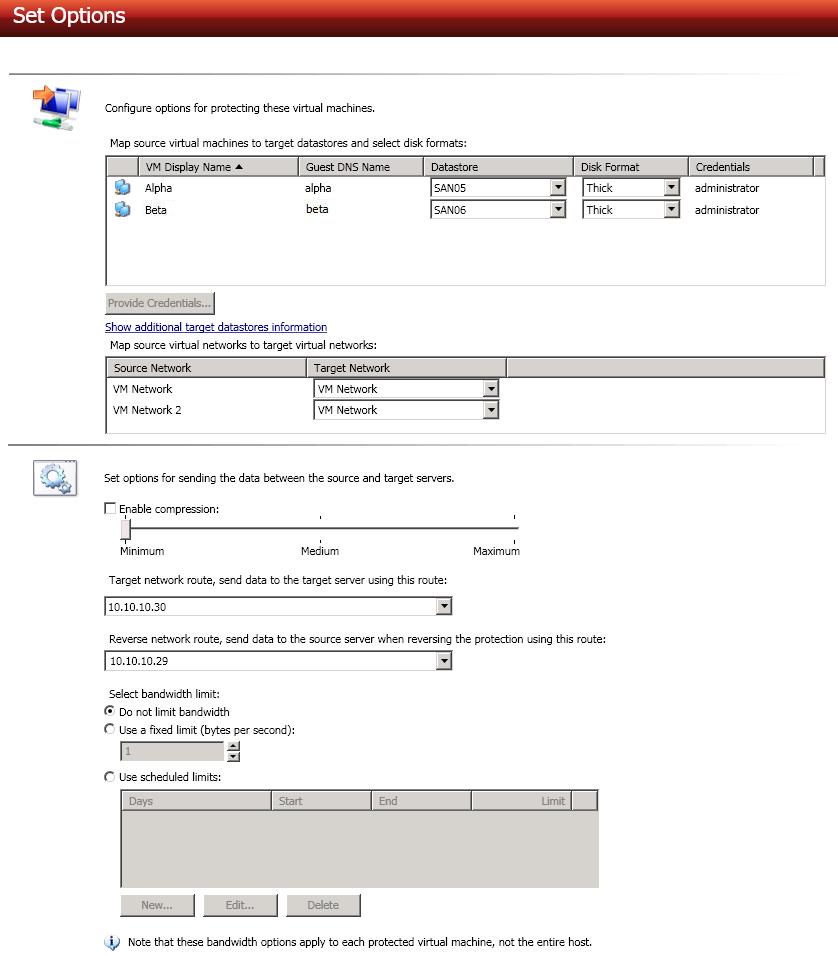
- Datastore—For each virtual server you are protecting, select a datastore on the target ESX host where the replica source virtual server will be created. If necessary, click Provide Credentials and specify a valid user on each virtual server. If you want to view disk information for the datastores on your target ESX host, click Show additional target datastores information. To hide the information, click Hide additional target datastores information.
- Disk Format—For each virtual server you are protecting, specify the type of disk, Flat (for ESX 5 only), Thick or Thin, that will be created on the replica virtual server.
- Target Network—For each virtual network on the source ESX host, select a network on the target ESX host to handle networking for the virtual servers after failover.
-
Enable compression—To help reduce the amount of bandwidth needed to transmit Double-Take data, compression allows you to compress data prior to transmitting it across the network. In a WAN environment this provides optimal use of your network resources. If compression is enabled, the data is compressed before it is transmitted from the source. When the target receives the compressed data, it decompresses it and then writes it to disk. On a default Double-Take installation, compression is disabled. To enable it, select this option and set the level from Minimum to Maximum to suit your needs.
Keep in mind that the process of compressing data impacts processor usage on the source. If you notice an impact on performance while compression is enabled in your environment, either adjust to a lower level of compression, or leave compression disabled. Use the following guidelines to determine whether you should enable compression.
- If data is being queued on the source at any time, consider enabling compression.
- If the server CPU utilization is averaging over 85%, be cautious about enabling compression.
- The higher the level of compression, the higher the CPU utilization will be.
- Do not enable compression if most of the data is inherently compressed. Many image (.jpg, .gif) and media (.wmv, .mp3, .mpg) files, for example, are already compressed. Some images files, such as .bmp and .tif, are decompressed, so enabling compression would be beneficial for those types.
- Compression may improve performance even in high-bandwidth environments.
- Do not enable compression in conjunction with a WAN Accelerator. Use one or the other to compress Double-Take data.
All jobs from a single source connected to the same IP address on a target will share the same compression configuration.
- Target network route—By default, Double-Take will select a default target route for transmissions. If desired, select a different target route.
- Reverse network route—If you selected a reverse appliance, Double-Take will select a default source route for transmissions. If desired, select a different source route.
-
Select bandwidth limit—Bandwidth limitations are available to restrict the amount of network bandwidth used for Double-Take data transmissions. When a bandwidth limit is specified, Double-Take never exceeds that allotted amount. The bandwidth not in use by Double-Take is available for all other network traffic.
All jobs from a single source connected to the same IP address on a target will share the same bandwidth configuration.
- Do not limit bandwidth—Double-Take will transmit data using 100% bandwidth availability.
- Use a fixed limit—Enter a value, in bytes per second, to limit data transmission. This is the maximum amount of data that will be transmitted per second.
- Use scheduled limits—Use a schedule to limit bandwidth for different times. Schedules that you create will be maintained if you change to a fixed limit or to no limit.
- New—Click New to create a new scheduled bandwidth limit. Specify the following information.
- Daytime entry—Select this option if the start and end times of the bandwidth window occur in the same day (between 12:01 AM and midnight). The start time must occur before the end time.
- Overnight entry—Select this option if the bandwidth window begins on one day and continues past midnight into the next day. The start time must be later than the end time, for example 6 PM to 6 AM.
- Day—Enter the day on which the bandwidth limiting should occur. You can pick a specific day of the week, Weekdays to have the limiting occur Monday through Friday, Weekends to have the limiting occur Saturday and Sunday, or Every day to have the limiting repeat on all days of the week.
- Start time—Enter the time to begin bandwidth limiting.
- End time—Enter the time to end bandwidth limiting.
- Preset bandwidth—Select a bandwidth limit rate from the common bandwidth limit values. The Bandwidth field will automatically update to the bytes per second value for your select bandwidth.
- Bandwidth—If desired, modify the bandwidth using a bytes per second value. The minimum limit should be 28000 bytes per second.
- Edit—Click Edit to modify an existing scheduled bandwidth limit.
- Delete—Click Delete to remove a scheduled bandwidth limit.
-
Click Next to continue.
-
Double-Take validates that your source and target are compatible. The Summary page displays your options and validation items.
Errors are designated by a white X inside a red circle. Warnings are designated by a black exclamation point (!) inside a yellow triangle. A successful validation is designated by a white checkmark inside a green circle. You can sort the list by the icon to see errors, warnings, or successful validations together. Click on any of the validation items to see details. You must correct any errors before you can enable protection.
Before a job is created, the results of the validation checks are logged to the Double-Take Management Service log on the target.
-
Once your servers have passed validation and you are ready to establish protection, click Finish, and you will automatically be taken to the Manage Jobs page.
Because this job type allowed you to create more than one job at a time, options that are job specific were not presented during the job creation process. Once the jobs are created, you can edit each one individually to see and edit all of the various job options. See Editing a V to ESX job.

 Related Topics