Open topic with navigation
Restoring then failing back files and folders jobs
Restoring before failing back allows your users to continue accessing their data on the
failed over target, which is standing in for the source, while you perform the restoration
process. The key to this process is to keep the users off of the source, but allow the
source and target to communicate to perform the restoration.
- Remove the source from the network and fix the issue that caused your source server to fail. Make sure in resolving the problems that you do not bring the source on the network at this time because the target currently has the source's identity because of failover.
- Disable all of the IP addresses on the source that you failed over to the target.
- If you failed over all of your source IP addresses, change an existing IP address on the source to a new, unique IP address that the target can access. If you inserted your source server into the console using a private IP address when you created the job, and you did not failover that private IP address, you can skip this step.
- Bring the source onto the network using the IP address that the target can access. This will either be the new, unique IP address you just created or the private IP address you originally used when inserting the server into the console. You can disregard any identity conflict errors.
- Stop any applications that may be running on the source. Files must be closed on the source so that updated files from the target will overwrite the files on the source.
- If you had to create a new, unique IP address on the source, you will have to remove the original source in the console and add it back in using the new, unique IP address. Complete this step on the Manage Servers page. If you inserted your source server into the console using a private IP address when you created the job, you can skip this step.
-
On the Manage Jobs page, highlight the job and click Restore.
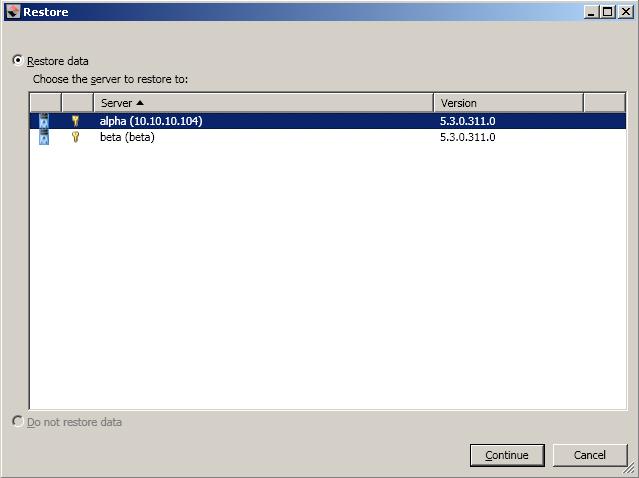
- Confirm Restore data is selected, then highlight your source server in the server list. Look for the new, unique IP address or the private IP address in parenthesis after the server name.
-
Click Continue to start the restoration.
During the restoration, only the data is restored back to the source.
Shares are not created on the source during the restoration. Shares
that were created on the target during failover will need to be created
manually on the source.
- When the restoration is complete, the Activity will indicate Restored, however, replication is still on-going. At this time, schedule a time for failback. User downtime will
begin once failback is started, so select a time that will have minimal disruption on
your users.
- On the Manage Jobs page, highlight the job and click Failback.
- Confirm that you want to failback the selected jobs and click Failback.
- Enable the IP addresses on the source that you disabled earlier. If desired, you can change the new, unique IP address back to its original address.
- After your source is online, stop your job by clicking Stop.
-
If you want to enable protection again, click Start.
Depending on where you are running the console from, you may need to add the target back to the console after failback in order to see your job.
If you have configured a source post-failback script, you must restart protection in order to launch the script.