
|
|
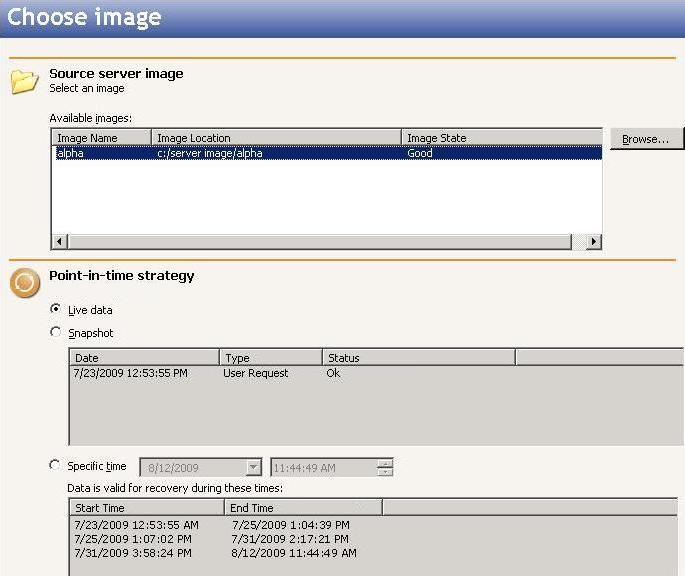
Select the image of the source that you want to recover and the point-in-time strategy.
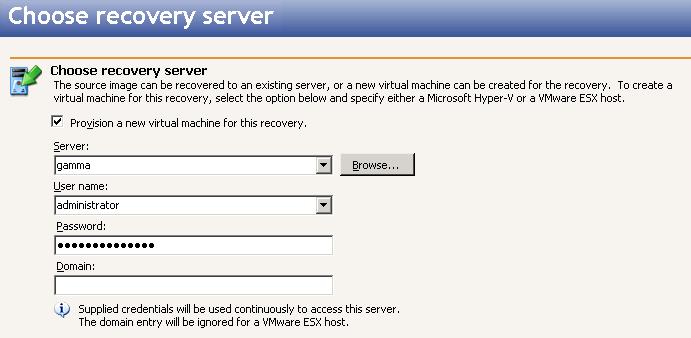
Select the recovery server. This is the Hyper-V server that will host the virtual machine that, after the recovery, will become your new source.
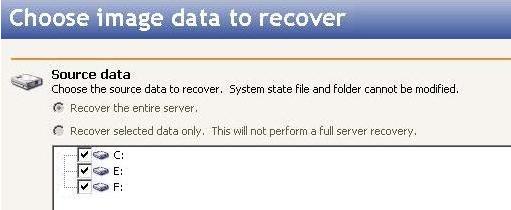
Because you are creating a new virtual machine, you must Recover the entire server so that the system state from the original source can be used to create the new virtual. You can exclude volumes that you protected but do not want to recover, but be careful when excluding data. Excluded volumes may compromise the integrity of your applications. Volumes marked with a checkmark are included. If there is no checkmark, the item is excluded.
Specify the volumes to create on the new virtual machine.

Controller Type—Specify the type of controller, IDE or SCSI, to be used for each volume.
The system volume must be an IDE controller. In addition, up to two more volumes can be attached to an IDE controller. If you are protecting more than three volumes on the source, you will need to install the Hyper-V Integration Components to acquire a SCSI device. See your Hyper-V documentation for more information.
If your source is Windows 2003 or Windows 2008 with no service packs and you have selected a SCSI controller, you will need to manually install the Hyper-V Integration Components after failover to attach these volumes to the replica virtual machine.
Specify the volume or cluster storage volume and the folder on the target server where the new virtual machine will be created. You can only select a volume that has enough free space available.

Configure the new virtual machine that will be created and will become the source after the recovery.
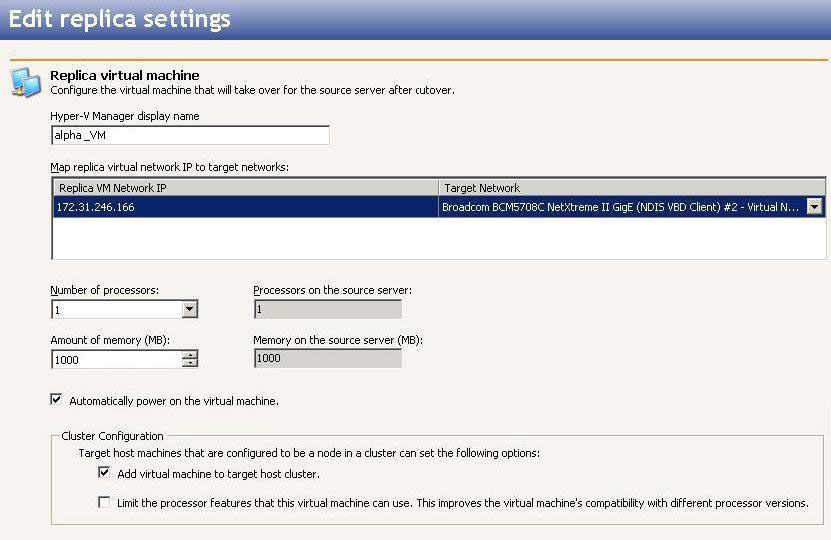
Cluster configuration options—Target host machines that are configured to be a node in a cluster can set the following options.
If the source is running Windows 2008 or later, the SAN policy must be set to Online. See your Microsoft documentation for more information on this policy.
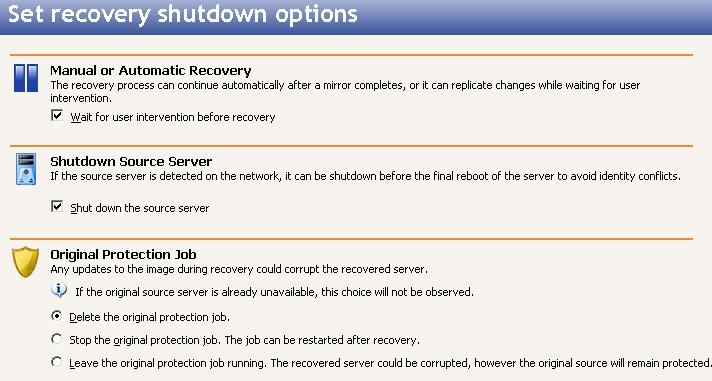
Specify your recovery shutdown options.
When the recovery mirror has completed, the Activity will change to Recovery Paused (unless you disabled the wait for user intervention option, in which case the recovery server will reboot immediately). Use this time to complete any necessary tasks. When you are ready to complete the recovery, click Recover on the Monitor page toolbar (the life preserver icon) to complete the recovery process. Once the recovery server has been rebooted, it will become the original source server.
Because the Windows product activation is dependent on hardware, you may need to reactivate your Windows registration after recovery. Follow the on-screen prompts to complete the reactivation.
 Related Topics