Open topic with navigation
Performing deduplication management tasks
If needed, you can move the location of your deduplication storage bin, or you can restore deduplicated files.
- Click Manage repositories in the Double-Take RecoverNow Console left navigation pane to take you to the Manage repository servers page, if you are not already there.
-
Click Perform deduplication tasks from the Manage repository servers page toolbar.
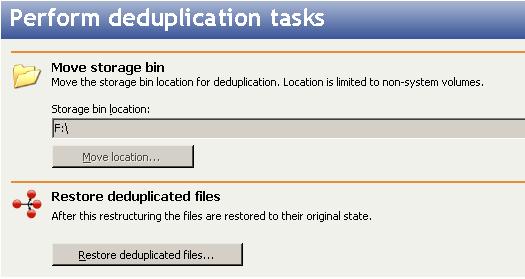
- If you want to move the location of the deduplication storage bin, click Move location. If you only have one non-system volume, you will be unable to move the storage bin location.
- Enter the new location and click OK.
- After the new deduplication scan is complete, manually delete the old storage bin using the AtomAdmin utility.
- To restore files that have been deduplicated, click Restore deduplicated files.
- Ensure you want to restore the deduplicated files by reviewing the information box and click Yes to continue with the restoration of the deduplicated files. Keep in mind that the restoration process is disk intensive, it may take awhile, and it will increase disk usage.
- If you need to cancel the restoration of deduplicated files after it has already started, click Cancel restore deduplicated files. You will not be able to initiate any other tasks while the restoration is being canceled.
- When you have completed your deduplication management tasks, click Close.
After a deduplication task has started, if the Atom File-Level Deduplication Service is stopped for any reason (including a server shutdown or crash) before the task has completed, that task will not be restarted automatically. You will need to restart the task manually.
