Open topic with navigation
You are here: Migration > Migrating an entire source to a provisioned virtual machine on a Hyper-V target
Migrating an entire source to a provisioned virtual machine on a Hyper-V target
Use the following instructions to migrate a source to a provisioned virtual machine on a Hyper-V target.
- Click Migrate Server from the left navigation pane.
- Identify the source server that you want to migrate.
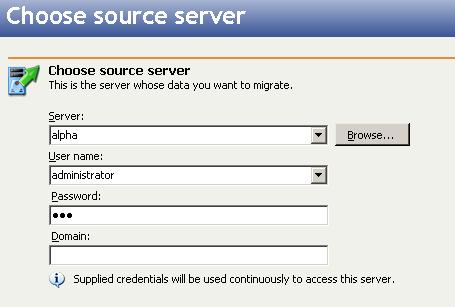
- Server—Specify the name of the source server. You can also click Browse to select the name from Active Directory or from a network drill-down list.
- User name—Specify a user that is a member of the Double-Take Admin security group on the source.
- Password—Specify the password associated with the User name you entered.
- Domain—If you are working in a domain environment, specify the Domain.
- Click Next to continue.
-
Identify the target server. This is the Hyper-V server that will host the virtual machine that, after the migration, will become your new source.
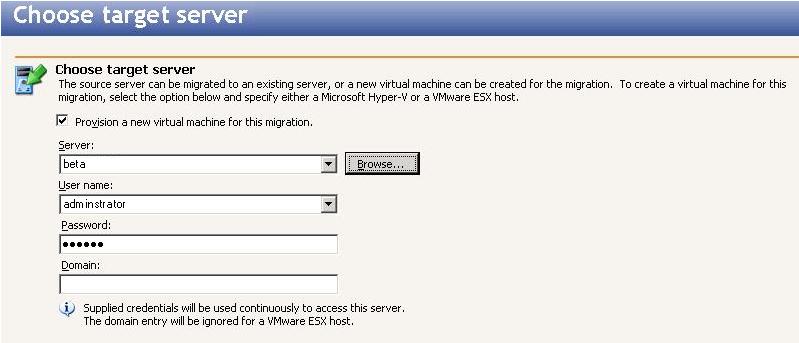
- Provision a new virtual machine for this migration—Enable this option to migrate to an automatically provisioned (non-existing) virtual machine hosted on a Hyper-V server.
- Server—Specify the name of the Hyper-V server. You can also click Browse to select the name from Active Directory or from a network drill-down list.
- User name—Specify a user that is a member of the Double-Take Admin security group on the target. If your source is the only domain controller in your network, the account must also be a local account in the local administrators group on the target.
- Password—Specify the password associated with the User name you entered.
- Domain—If you are working in a domain environment, specify the Domain.
- Click Next to continue.
-
By default, Double-Take Move selects your entire source for migration. If desired, you can exclude volumes that you do not want to migrate, but be careful when excluding data. Excluded volumes may compromise the integrity of your installed applications. There are some volumes that you will be unable to exclude, because they are required for migration. For example, the boot and system volumes cannot be excluded because that is where the system state information is stored. For non-boot and non-system volumes, you can exclude them if necessary. Volumes marked with a checkmark are included. If there is no checkmark, the volume is excluded. Click on an item to add or remove a checkmark. Once you have configured the data to migrate, click Next to continue.
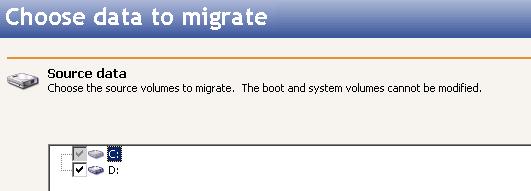
The Select all and Deselect all buttons allow you to quickly select or deselect all user data on your server. These buttons do not change the selection of system state data, which is defined by Double-Take Move and cannot be modified manually.
-
Specify the volumes to create on the new virtual machine.
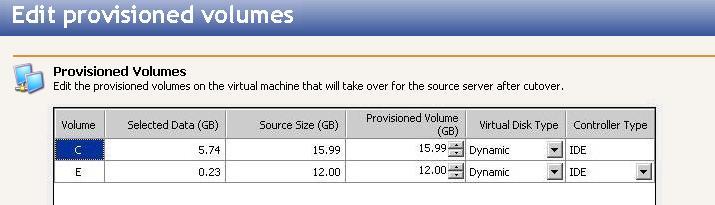
- Selected Data—This displays the amount of data, in gigabytes, currently on the source volume.
- Source Size—This displays the size, in gigabytes, of the volume on the source.
- Provisioned Volume—Specify the size, in gigabytes, of the volume to be created on the new virtual.
- Virtual Disk Type—For each volume you are protecting, specify the type of disk, Dynamic or Fixed, that will be created on the virtual machine.
-
Controller Type—Specify the type of controller, IDE or SCSI, to be used for each volume.
The system volume must be an IDE controller. In addition, up to two more volumes can be attached to an IDE controller. If you are protecting more than three volumes on the source, you will need to install the Hyper-V Integration Components to acquire a SCSI device. See your Hyper-V documentation for more information.
If your source is Windows 2003 or Windows 2008 with no service packs and you have selected a SCSI controller, you will need to manually install the Hyper-V Integration Components after failover to attach these volumes to the replica virtual machine.
- Click Next to continue.
-
Specify the volume or cluster storage volume and the folder on the target server where the new virtual machine will be created. You can only select a volume that has enough free space available.
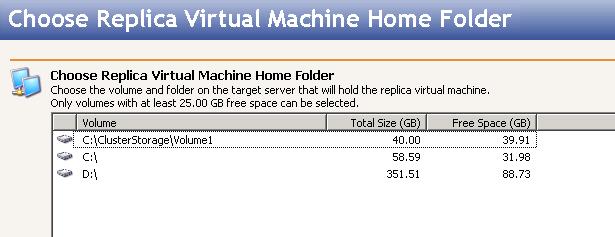
- Click Next to continue.
-
Configure the new virtual machine that will be created and will become the source after the migration.
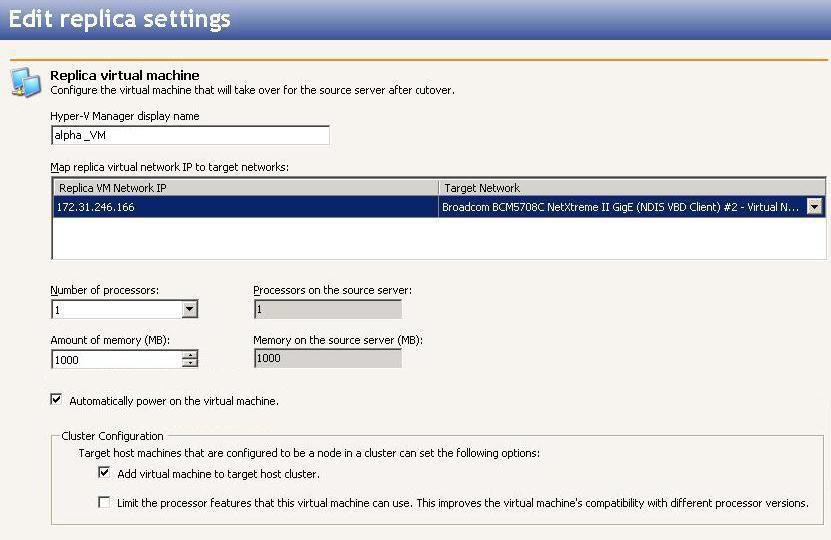
- Hyper-V Manager display name—By default, the source name_VM will be used to create the new virtual machine display name. If desired, you can modify the name.
- Map replica virtual network IP to target networks—You will need to identify how you
want to handle the network mapping. The Replica VM Network IP lists the IP addresses
on the source. Map each one to a Target Network, which is
a virtual network on the Hyper-V server.
- Number of processors—Specify how many processors to configure on the virtual machine.
The number of processors on the source is displayed.
- Amount of memory—Specify the amount of memory, in megabytes, to configure on the virtual machine.
The amount of memory on the source is displayed.
- Automatically power on the virtual machine—Select this checkbox if you want the virtual machine to automatically start after cutover.
-
Cluster configuration options—Target host machines that are configured to be a node in a cluster can set the following options.
- Add virtual machine to target host cluster—Select this option to automatically add the new virtual machine to the cluster on the target host machine. The target must be running Windows 2008 R2, have at least one cluster shared volume, and be configured to be a node in the cluster.
- Limit the processor features that this virtual machine can use—Select this option to allow Hyper-V live migrations between cluster nodes with different processor versions. The target must be running Windows 2008 R2, have at least one cluster shared volume, and be configured to be a node in the cluster.
If the source is running Windows 2008 or later, the SAN policy must be set to Online. See your Microsoft documentation for more information on this policy.
- Click Next to continue.
-
Specify your migration shutdown options.
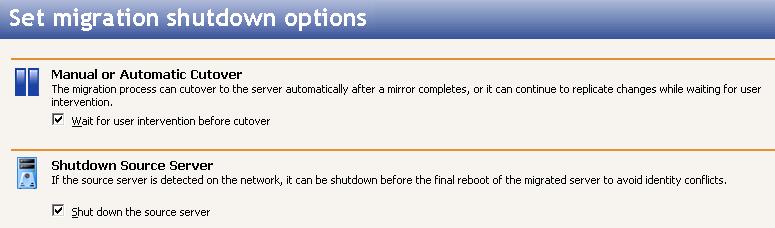
- Wait for user intervention before cutover—If you select this option, Double-Take Move will pause the migration process after the source data has been mirrored to the target, which allows you time to coordinate any other tasks. Replication will continue during this time. If you do not select this option, cutover will be automatic, meaning the source will cutover to the target immediately after the mirror is complete. If your source is running applications, it is important that you enable this option. During the intervention time, you can stop your applications that are running on the source. This lets you stop services cleanly on the source and let that final application data be replicated and applied on the target. This helps ensure your applications will start cleanly on the target after cutover.
- Shut down the source server—Specify if you want to shut down the source server before the source is cutover to the target, which avoids identity conflicts on the network. The shutdown will occur after mirroring is completed but before the source system state is applied to the target server.
- Click Next to continue.
- At the Migration summary page, you can review the choices you have made and you can also configure optional settings. If you need to make any changes to the selections you made, click Back to return to the previous pages. If you want to configure optional settings, click Configure. Once you have completed your configuration, click Finish to start the migration.
- Monitor the progress of the migration mirror on the Monitor page.
- When the migration mirror has completed, the target may or may not reboot automatically depending on your selection for Wait for user intervention before cutover. If you disabled user intervention, the target will reboot automatically to complete the migration process. If you enabled user intervention, when the migration mirror is complete, the status will change to Ready for Cutover. Use this time to complete any necessary tasks. When you are ready to complete the migration, click Cutover on the Monitor page toolbar to complete the migration process, which will reboot the target.
Once the virtual machine has been rebooted, it will become the source server.
You must install Integration Services after cutover for SCSI drives and mouse drivers to function correctly on the new virtual machine.
Your Hyper-V virtual machine will not start if the amount of memory it is configured to start with is more than the free physical memory available. This may happen if the amount of free physical memory changes after you have created your migration job. In this case, you must manually modify the virtual machine's memory settings and then manually start the virtual machine.
If your source was disconnected from the network during the cutover process, the original job that was mirroring the data will still be active on that machine. Do not bring that machine back on the network. If you do, the original job will attempt to begin mirroring data again which could result in data loss. While the machine is still disconnected from the network, stop the Double-Take service, delete the file connect.sts located in the Double-Take Move installation directory, and then restart the Double-Take service. This will delete the original job. After the original job is deleted, you can bring the machine on the network if desired.
 Related Topics