
|
|
Use these instructions for Hyper-V to Hyper-V protection.
Specify your source server. This is the Hyper-V source that contains the virtual machine that you want to protect.
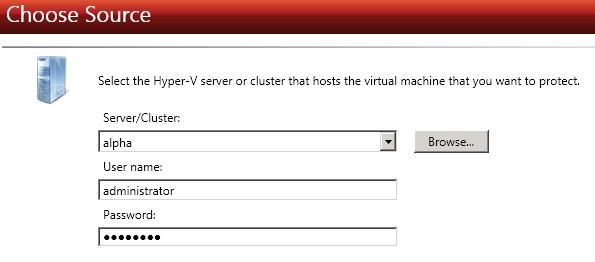
Server/Cluster—Specify the name or IP address of the Hyper-V server or cluster that is hosting the virtual machine that you want to protect. You can click Browse to select a server from a network drill-down list.
If you enter the source server's fully-qualified domain name, the Double-Take Console will resolve the entry to the server short name. If that short name resides in two different domains, this could result in name resolution issues. In this case, enter the IP address of the server.
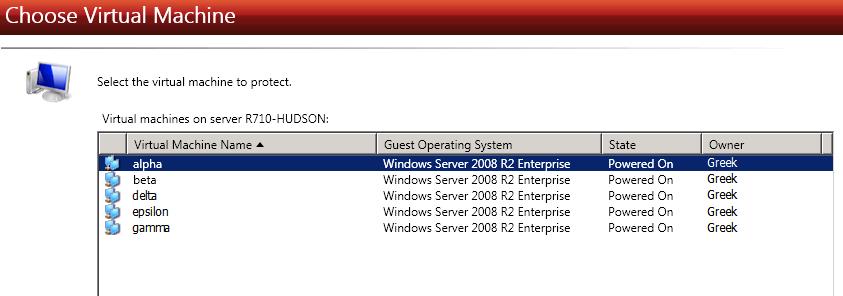
Choose the virtual machine on the Hyper-V source that you want to protect. The list of virtual machines will vary depending on whether your source is a Hyper-V server, cluster, or node. Select a virtual machine from the list and click Next to continue.
Specify your target server. This is the Hyper-V target where you will store the replica of the source server.
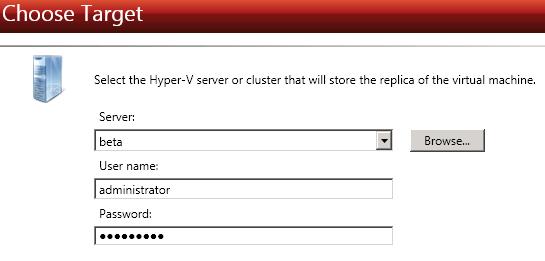
Server—Specify the name or IP address of the Hyper-V server or cluster that will be hosting the replica of the source server. You can click Browse to select a server from a network drill-down list.
If you enter the target server's fully-qualified domain name, the Double-Take Console will resolve the entry to the server short name. If that short name resides in two different domains, this could result in name resolution issues. In this case, enter the IP address of the server.
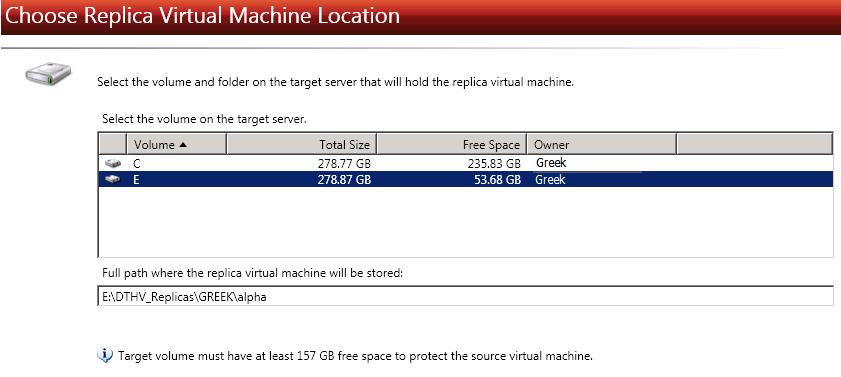
Select a home folder on the Hyper-V target for the replica virtual machine.
Configure the replica virtual machine.
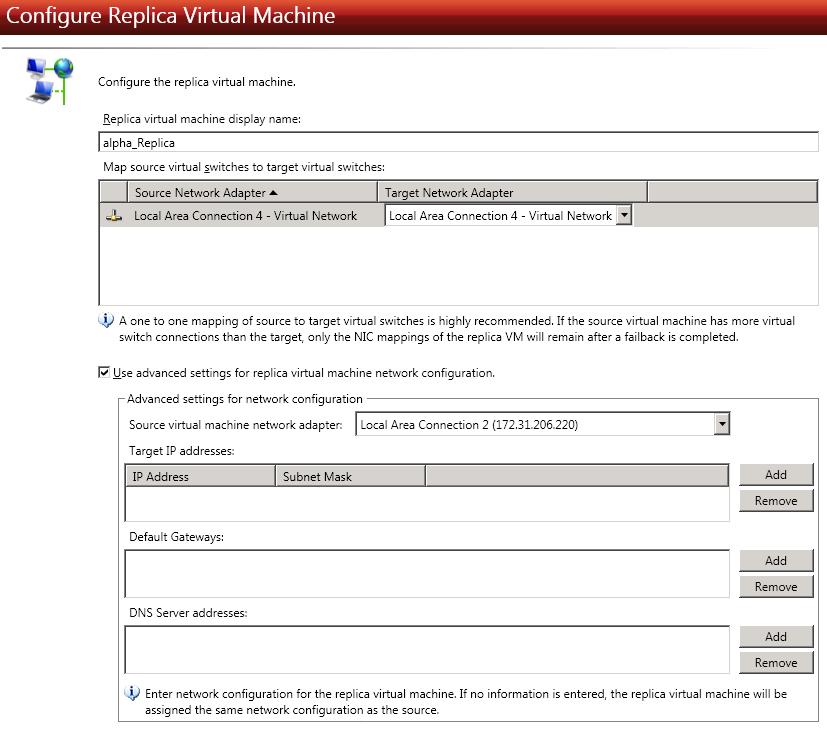
Advanced settings for network configuration—These options are only displayed if you have enabled the advanced settings and supplied valid credentials. For each Source virtual machine network adapter, you can specify Target IP addresses, Default Gateways, and DNS Server addresses.
Updates made during failover will be based on the network adapter name when protection is established. If you change that name, you will need to delete the job and re-create it so the new name will be used during failover.
If you update one of the advanced settings (IP address, gateway, or DNS server), then you must update all of them. Otherwise, the remaining items will be left blank. If you do not specify any of the advanced settings, the replica virtual machine will be assigned the same network configuration as the source.
Specify your protection settings.
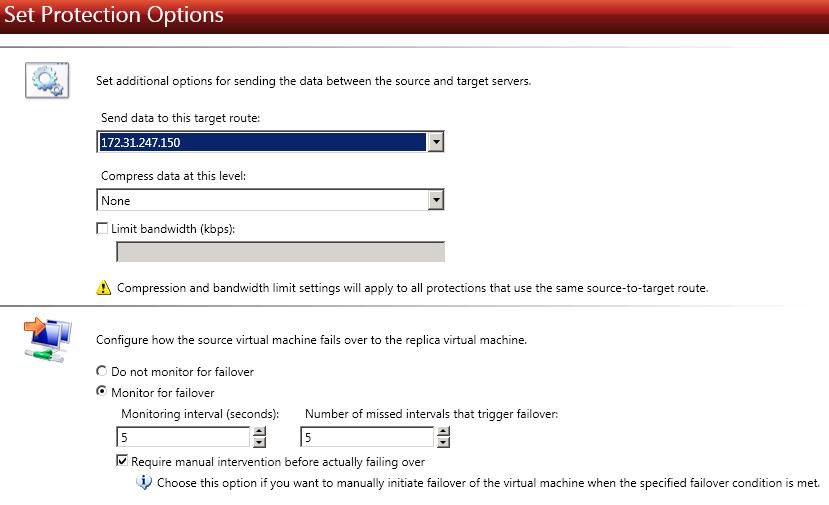
Monitor for failover—Select this option if you want the target to actively monitor the source for a failure. Specify the Monitoring interval, which is the number of seconds between monitor requests sent from the target to the source to determine if the source is online, and the Number of missed intervals that trigger failover, which is the number of monitor replies sent from the source to the target that can be missed before assuming the source has failed.
To achieve shorter delays before failover, use lower interval and missed interval values. This may be necessary for servers, such as a web server or order processing database, which must remain available and responsive at all times. Lower values should be used where redundant interfaces and high-speed, reliable network links are available to prevent the false detection of failure. If the hardware does not support reliable communications, lower values can lead to premature failover. To achieve longer delays before failover, choose higher values. This may be necessary for servers on slower networks or on a server that is not transaction critical. For example, failover would not be necessary in the case of a server restart.
When you are satisfied with your workflow selections, click Finish, and you will automatically be taken to the Manage Jobs page.
Once protection is established, Double-Take Availability monitors the virtual disks of the protected virtual machine for changes to the disk layout. If a new virtual hard disk is added to the virtual machine, the protection job will automatically be updated to include the new virtual hard disk, and a file difference mirror will automatically start. However, if a virtual hard disk is removed from the protected virtual machine, the virtual hard disk will not be removed from the projection job until it is deleted from the source or the protection job is deleted and re-created.
If you need to modify a job's settings after it has been created, you can do so after the mirror has completed by highlighting the job on the Manage Jobs page, selecting View Job Details, and then clicking the View job properties link. You will be taken back to the Protection Summary page where you can edit the job's settings..
If your source is a cluster and the Double-Take service on the source is stopped and restarted but failover is not initiated, you will need to manually bring the supporting cluster resource back online through the cluster manager in order for your Hyper-V job to reconnect and transition to a good state. The resource is called DTTargetRes_VM to Target, where VM is the name of your virtual machine and Target is the name of your target. The resource will be located in the Other Resources group.
If your source is a cluster and your cluster resource moves to a node that Double-Take Availability considers a bad node (for example, the Double-Take service is not running or the node has an invalid activation code), your job will enter an error state. You must fix the issue on the cluster node and then you can restart the job. However, if this situation occurs on a target cluster, the job will no longer appear in the console. In this case, you will need to fix the issue on the cluster node and then bring the supporting cluster resource back online through the cluster manager. The resource is called DTTargetRes_VM to Target, where VM is the name of your virtual machine and Target is the name of your target. The resource will be located in the Other Resources group.