| Note: | The fields in the Application Manager console will vary depending on the type of application you are protecting. |
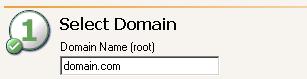
Application Manager will automatically identify the root domain where the Application Manager is running and populate the Domain Name field. If necessary, change the domain name to a trusted root domain that the Application Manager console can connect to. If prompted, enter security credentials with administrator privileges for the domain.
| Note: |
Domain names must include a suffix, such as .com, .corp, .net, and so on. If you are protecting Exchange, the domain must be the root of the forest domain because that is where all Exchange server objects reside, even if the Exchange server is a member of a child domain. |
Application Manager will automatically attempt to populate the Source Server and Target Server lists with any servers in the specified domain that are running the application you are protecting. Select your source and target servers.

| Note: |
If you have previously used this source and target pair, you will be prompted to reuse the previous configuration. If you select Yes, your previous configuration settings will be used. If you do not want to use the previous configuration settings (perhaps the source or target configuration has changed since you configured the connection), select No to use the default configuration settings. If you select a source that is currently unavailable, you will be prompted to select the target first. When you select the target then the source, you may get a failover prompt or the same source is unavailable prompt. This will depend on if a failover condition has been met according to the original failover configuration. You cannot protect a server if it is already functioning as a target. If you are using a cluster environment, select your virtual server as you would a physical server. If you are protecting Exchange, the target you select must be in the same Exchange administrative group as the source. If you are protecting Exchange in a like-named cluster scenario, select the same server for the source and target. The target server name will automatically be appended with the suffix like-named. Enter the requested information in the Like-named Cluster Setup dialog box.
If you have protecting multiple Exchange virtual servers, you can configure multiple like-named cluster protection connections, or you can failover multiple Exchange virtual servers to pre-existing Exchange virtual servers on the target. In this case, select the target Exchange virtual server. If you are protecting Exchange 2003 and it is running in mixed mode, the first installed Exchange virtual server contains the MTA (Message Transfer Agent) resource that is needed to communicate with versions prior to Exchange 2003. If you do not failover all Exchange virtual servers, then any user who is in a different mail store than the first one may not be able to route mail. If you are protecting SharePoint, enter the SharePoint Front-End Web Server and click Get Config to populate the Source Server list. If no servers are populated in the lists (perhaps the server you need is in a child domain), click Advanced Find to add servers to the lists. Advanced Find is not available for all application protections. See Managing servers for more details on Advanced Find. Server names must be 15 characters or less. You will be unable to configure protection when your environment between the Application Manager and the source or target contains a NAT or certain VPN configurations. This is due to WMI limitations. Contact technical support for instructions to configure protection manually. |
- You can enter a user for a different domain by entering a fully qualified name in the format domain\username or username@domain. If you enter a non-qualified name, the DNS domain from the DNS server will be used.
- The login account must be a member of the local administrators security group.
- The login account must be a member of the Double-Take Admin security group.
- If you will be configuring DNS failover, the login account must be a member of the domain DnsAdmins security group.
- If you are protecting Exchange, the following requirements apply to the login credentials.
- The login account must be an Exchange Full Administrator at the organizational level, as delegated via the Exchange System Manager at the user level or have delegated rights via the Application Manager Delegate Rights feature (select Tools, Delegate Rights). Rights must be delegated to a specific user and not the group the user belongs to in order for the Application Manager to recognize them.
- The login account must have rights to manage Exchange in order to query and modify the Exchange Active Directory objects.
- If Exchange is on a cluster, the login account must be a member of the Cluster Administrators security group on each node. Additionally, the same cluster service account should be used for both the source and target.
- If you are protecting SQL, the login account must be assigned the System Administrator role on the SQL server in order to query and administer SQL.
- If you are protecting SharePoint, the following requirements apply to the login credentials.
- The login account must be assigned the System Administrator role on the SQL server in order to query and administer SQL.
- The login account must be the same farm administrator account used when installing and configuring SharePoint.
- The login account must have local administrator rights on the source and target front-end web servers and the source and target back-end SQL servers.
- If you are protecting BlackBerry and the login account is the BesAdmin account, you will need to add that account to the Double-Take Admin group on the source and target servers.