Job creation example
The following example uses Postman to create a Windows full server to ESX job. The general workflow of the example is the same for other job types, but you may need to make some modifications for your environment and job type.
This example and the collection of requests was created using Postman version 7.33.1.
If you need help using Postman, see the online Postman documentation.
-
If you do not already have it, download Postman from https://www.postman.com/downloads/ and install it.
-
Open Postman.
- For this example, turn off the SSL certificate verification using the following steps in Postman.
- Select File, Settings.
Disable SSL certificate verification so the toggle is on the right and says off.
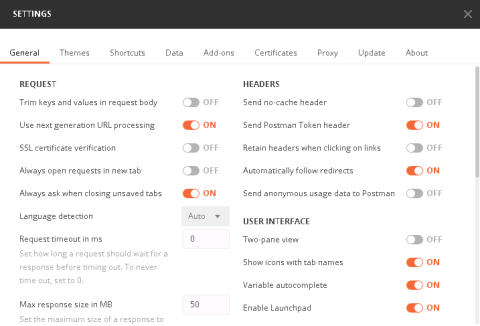
- Close the Settings window.
-
Download the REST API: Create Full Server to ESX Job collection from https://download.doubletake.com/_download/Documentation/RestApi/REST_API_CreateWindowsFullServerToEsxJob.postman_collection.zip. This is a sample collection of requests that demonstrate the process of creating a Windows full server to ESX job using the REST API.
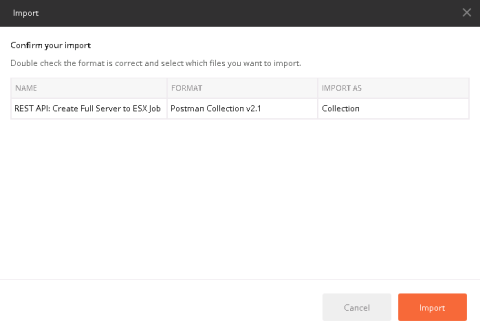
- Import the collection using the following steps.
- Click Import.
- In the File tab, click Upload Files.
- Locate and select the file you downloaded in step 4.
Click Import.
-
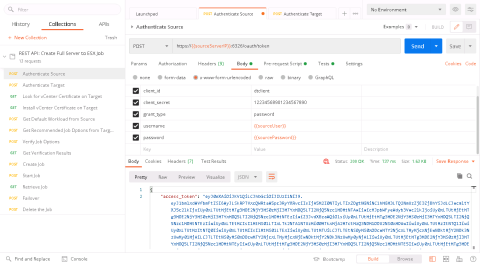
As outlined in the Job creation overview , your first steps are to establish a connection to the source and target servers. Start with the Authenticate Source request, entering appropriate values for your environment on the Pre-request Script tab. This request sets several global variables that are used throughout the rest of this collection.
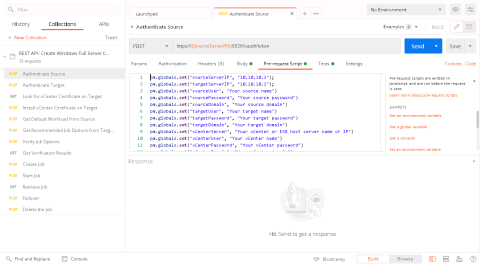
If you do not need to use a variable, remove the comment and leave it blank. For example, if you are not in a domain environment, change the pm.globals.set("sourceDomain", "Your source domain") to pm.globals.set("sourceDomain", "").
-
Send the request by clicking Send.
-
Note the values sent in the Body of the source server request. These values are case-sensitive.
-
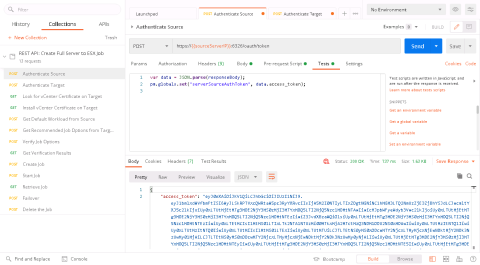
Also note on the Tests tab that the request saves the authentication token in a global variable that is passed to subsequent requests to the source server in the request header.
Authentication tokens expire. You may have to execute the authentication request again if the token has timed out.
-
Go to the Authenticate Target request and click Send. (You do not need to populate Pre-request Script.)
-
Again, note the values sent in the Body of the target server request and the Tests tab. The values are saved in a global variable that is passed to subsequent requests to the target server.
- For a Windows full server to ESX job, you may need to install a certificate on the target. (In order for the target server to communicate with the vCenter server or ESX host server, it must have the certificate from that server installed.) Send the Look for vCenter Certificate on Target request to determine if you need a certificate.
- False—If the result of the request is false, you do not need to install a certificate.
- True—If the result of the request is true, you will see the raw data of the certificate. The certificate data will be stored in a global variable as seen on the Test tab. You need to Send the Install vCenter Certificate on Target request to apply the certificate. (If you receive an error message as a result that says pCertContext is invalid, this is likely due to user permissions, but the public portion of the certificate has been installed successfully.)
Installing a certificate is only required once. After it has been installed, you will not need to do it again.
-
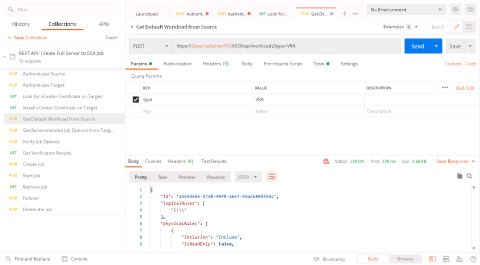
Next in the job creation process, you need to create the workload, which identifies the volumes and directories on the source you want to protect. Send the Get Default Workload from Source request. The result of the request is stored in global variables to be used in the next step. If there are volumes or directories on the source that you do not wish to protect, you can update the workload object before submitting the next request.
-
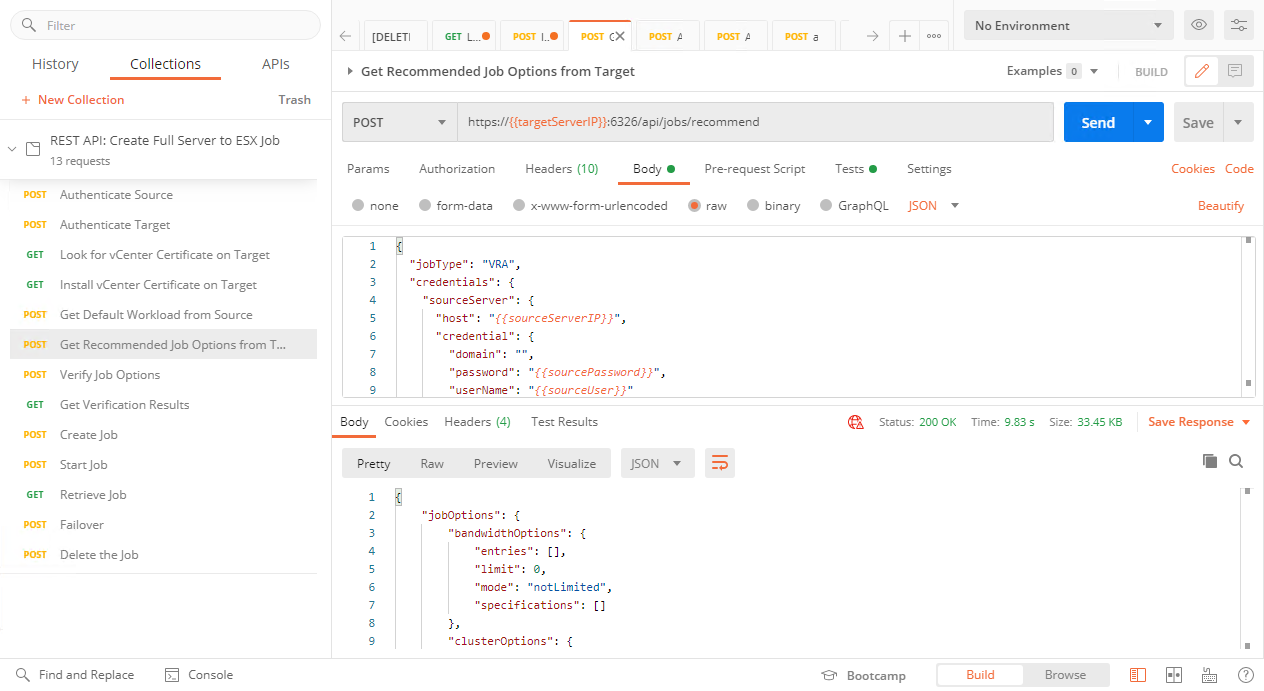
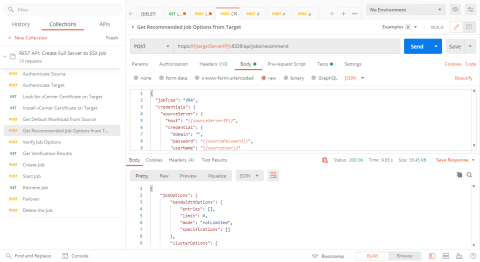
Before you can create the job, you need to start with the recommended job options. Send the Get Recommended Job Options from Target request. The result of the request is the recommended job options determined by the target server based on the submitted workload options and target environment. The result is stored in global variables to be used in the verification and create jobs requests. If there are job options that you wish to change, you can update the values in the job options object before submitting the next request.
-
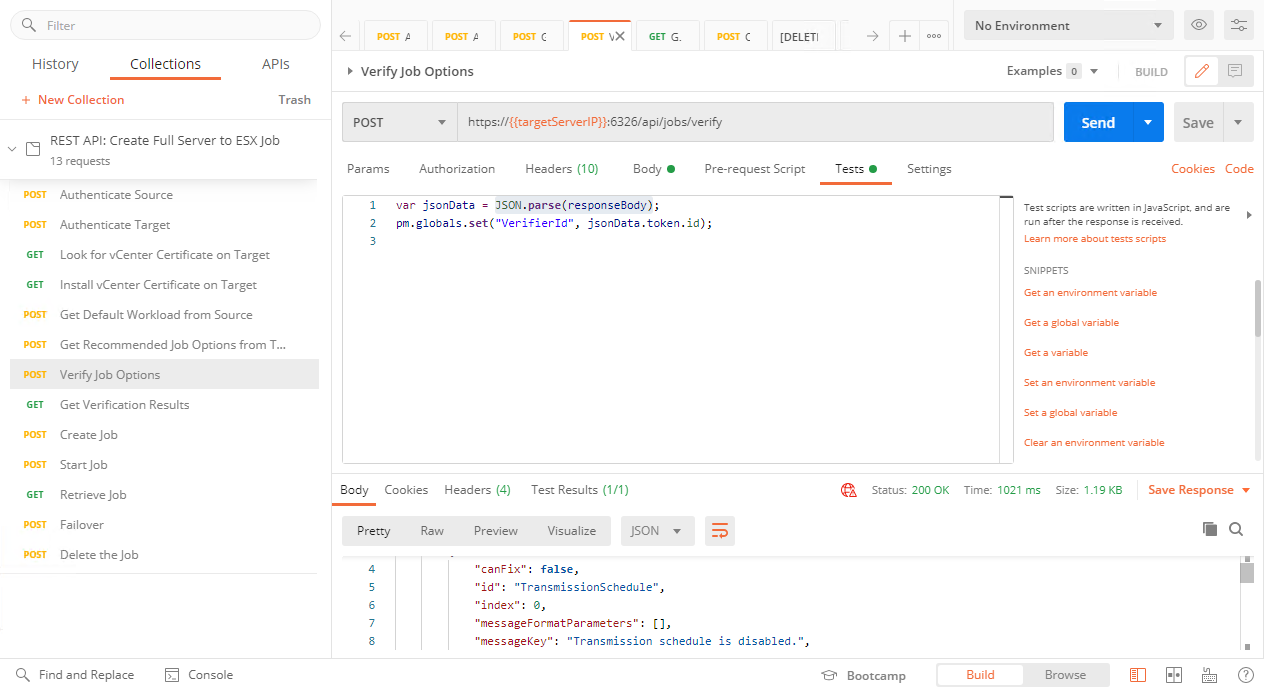
If desired you can verify the job options that were identified for your workload and target environment. Send the Verify Job Options request. The target will execute a number of verifiers on the job options to ensure that the job options are compatible with the environment. This is an asynchronous request so it will return immediately even though the verification is on-going. The request returns an ID that is saved in a global variable and passed to the Get Verification Results request to retrieve the results of the verification process.

-
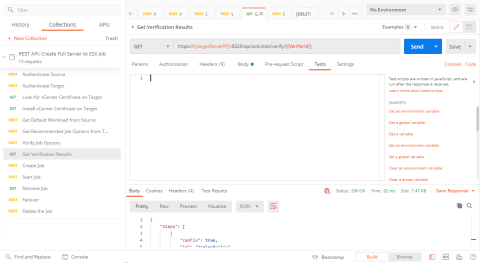
If you verified the job options, you can Send the Get Verification Results request to retrieve the results of the verification process. An array of verification results is returned. Each result includes a Status. If any status is In Progress then verification is still executing. Send this request until there are no verification results still in progress.
-
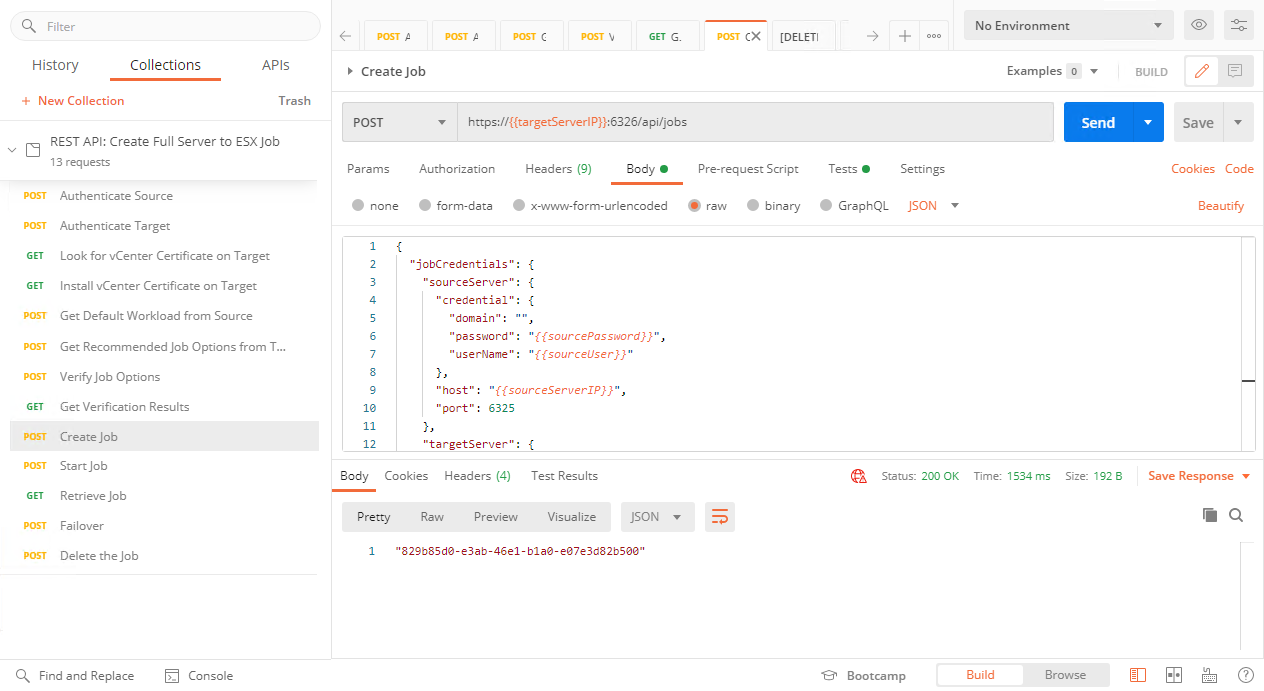
To create the job, Send the Create Job request. This request is for the target server and will assign a GUID referred to as the Job ID. The Job ID is used in many of the job requests to retrieve and execute actions on the job, such as start, stop, and failover. The Job ID is saved in a global variable.

-
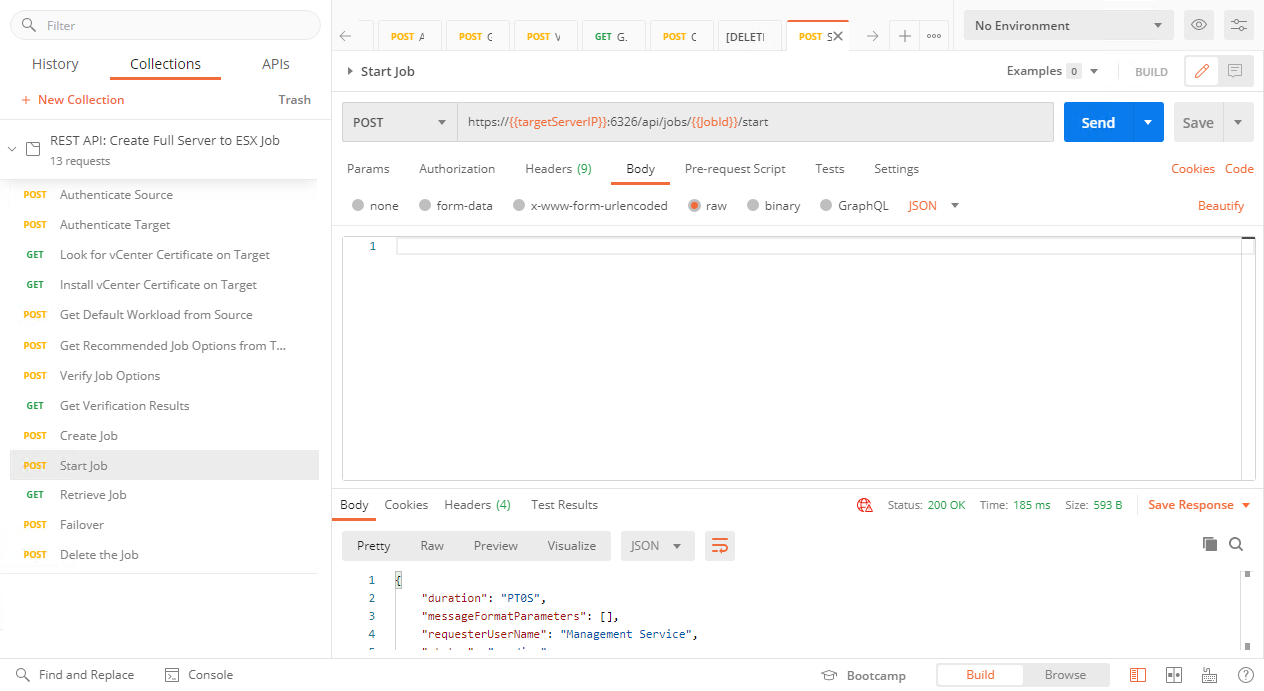
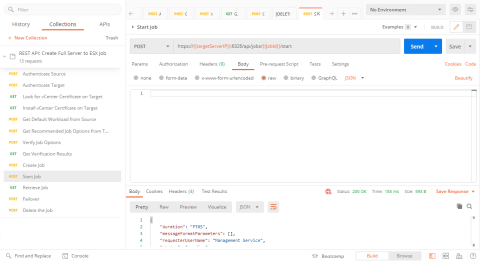
To start the job that you created, Send the Start job request. In the case of an ESX job, the target will provision the replica virtual machine and then the job will start mirroring. Other job types will begin mirroring immediately.
-
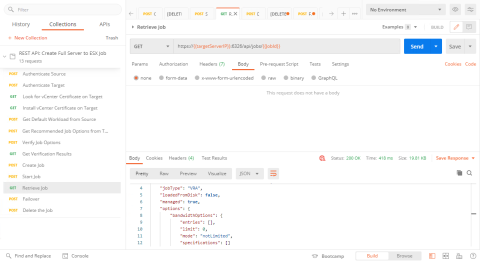
Once a job is created, you can Send the Retrieve Job request to get the status of the job and to manage it (such as start, stop, or failover). You can also add the target server to any Carbonite Availability or Carbonite Migrate Replication Console and see the status and manage the job from the console.