|
|
Use the following instructions to create a data protection or full server protection job.
With protection and recovery jobs, your servers can be in a NAT environment. However, you must make sure you have added your servers to the Double-Take Console using the correct IP address.
Click Get Started from the toolbar.
Select Double-Take DR and click Next.
Select Protect files and folders or an entire Windows server and click Next.
Choose your source server. This is the server that you want to protect or it contains the data that you want to protect.
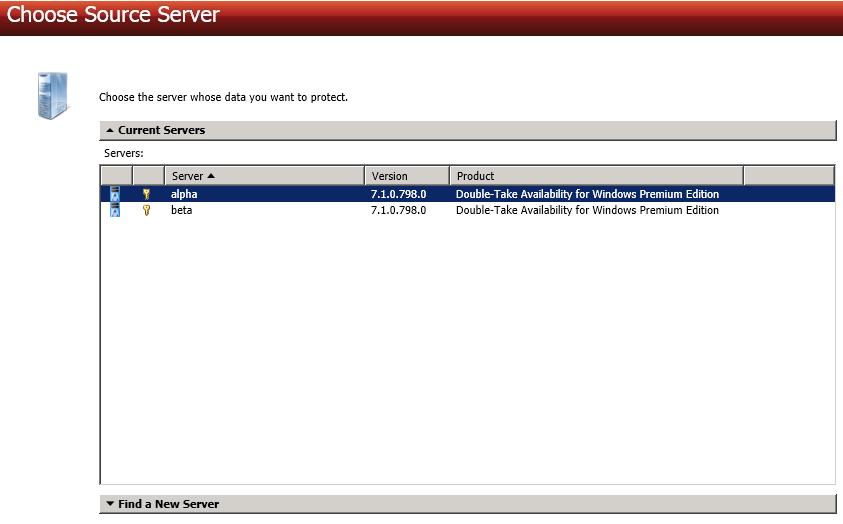
If you enter the source server's fully-qualified domain name, the Double-Take Console will resolve the entry to the server short name. If that short name resides in two different domains, this could result in name resolution issues. In this case, enter the IP address of the server.
When specifying credentials for a new server, specify a user that is a member of the local Double-Take Admin and local administrator security groups.
Choose the type of workload that you want to protect. Under Server Workloads, in the Workload types pane, select Full Server for Windows if you want to protect the entire source server, or select Data for Windows if you want to protect specific data on the source server. In the Workload items pane, select the volumes on the source that you want to protect.
If the workload you are looking for is not displayed, enable Show all workload types. The workload types in gray text are not available for the source server you have selected. Hover your mouse over an unavailable workload type to see a reason why this workload type is unavailable for the selected source.
To select your files and folders in more detail, click the Replication Rules heading and expand the volumes under Folders.
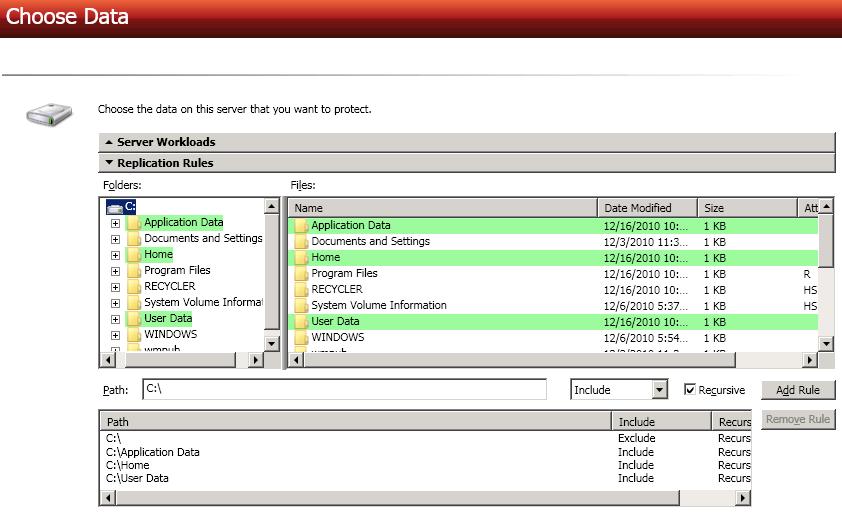
Volumes and folders with a green highlight are included completely. Volumes and folders highlighted in light yellow are included partially, with individual files or folders included. If there is no highlight, no part of the volume or folder is included. To modify the items selected, highlight a volume, folder, or file and click Add Rule. Specify if you want to Include or Exclude the item. Also, specify if you want the rule to be recursive, which indicates the rule should automatically be applied to the subdirectories of the specified path. If you do not select Recursive, the rule will not be applied to subdirectories.
You can also enter wildcard rules, however you should do so carefully. Rules are applied to files that are closest in the directory tree to them. If you have rules that include multiple folders, an exclusion rule with a wild card will need to be added for each folder that it needs applied to. For example, if you want to exclude all .log files from D:\ and your rules include D:\, D:\Dir1 , and D:\Dir2, you would need to add the exclusion rule for the root and each subfolder rule. So you will need to add exclude rules for D:\*.log , D:\Dir1\*.log, and D:\Dir2\*.log.
If you need to remove a rule, highlight it in the list at the bottom and click Remove Rule. Be careful when removing rules. Double-Take may create multiple rules when you are adding directories. For example, if you add E:\Data to be included in protection, then E:\ will be excluded. If you remove the E:\ exclusion rule, then the E:\Data rule will be removed also.
If you return to this page using the Back button in the job creation workflow, your Workload Types selection will be rebuilt, potentially overwriting any manual replication rules that you specified. If you do return to this page, confirm your Workload Types and Replication Rules are set to your desired settings before proceeding forward again.
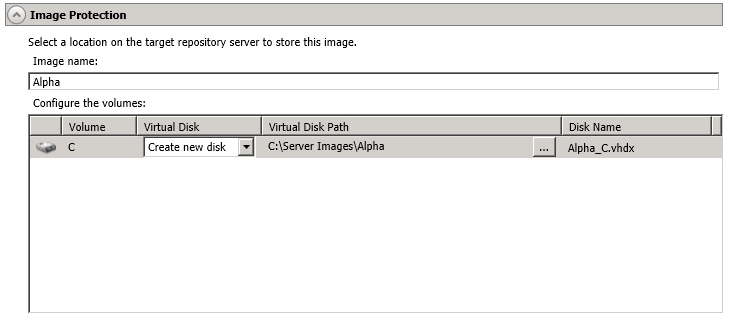
Choose your target repository server. This is the server that will store the image of the source or the image of the protected data from the source.
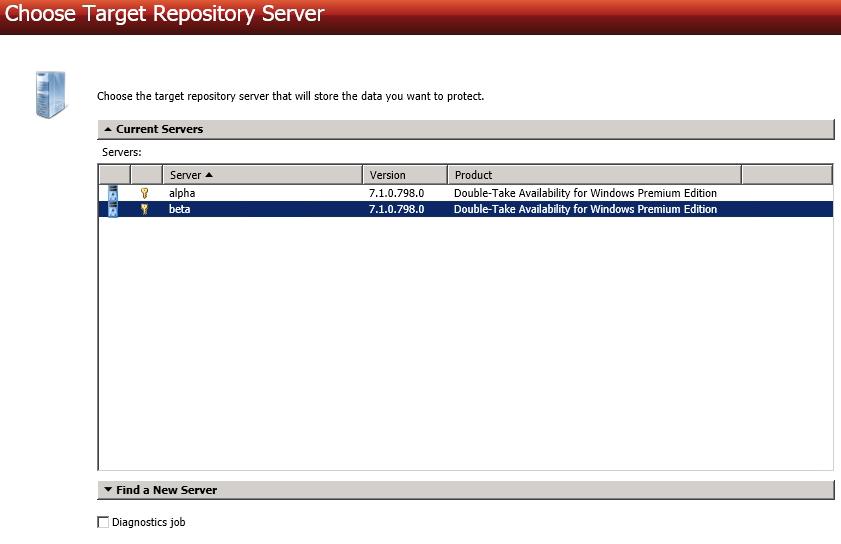
If you enter the target server's fully-qualified domain name, the Double-Take Console will resolve the entry to the server short name. If that short name resides in two different domains, this could result in name resolution issues. In this case, enter the IP address of the server.
When specifying credentials for a new server, specify a user that is a member of the local Double-Take Admin and local administrator security groups.
You have many options available for your DR protection job. Configure those options that are applicable to your environment.
Click a link below to see the options available for that section of the Set Options page.
Double-Take validates that your source and target are compatible. The Summary page displays your options and validation items.
Errors are designated by a white X inside a red circle. Warnings are designated by a black exclamation point (!) inside a yellow triangle. A successful validation is designated by a white checkmark inside a green circle. You can sort the list by the icon to see errors, warnings, or successful validations together. Click on any of the validation items to see details. You must correct any errors before you can continue.
Once your servers have passed validation and you are ready to establish protection, click Finish, and you will automatically be taken to the Manage Jobs page.
Jobs in a NAT environment may take longer to start.
 General