
|
Using the Connection Manager Transmit tab, you can set start and stop criteria along with a schedule window.
Double-Take Availability checks the schedule once every second, and if a user-defined criteria is met, transmission will start or stop, depending on the option specified.
Any replication sets from a source connected to the same IP address on a target will share the same scheduled transmission configuration.
Select the Transmit tab. The Transmit tab contains four limit types: Bandwidth, Start, Stop, and Window. The transmission options for each limit type are displayed by highlighting a selection in the Limit Type box.
At the top of the Transmit tab dialog box, the Enable Transmission Limiting check box allows you to turn the transmission options on or off. You can enable the transmission options by marking the Enable Transmission Limiting check box when you want the options to be applied, but you can disable the transmission options, without losing the settings, by clearing that check box.
Also at the top of the Transmit tab dialog box, the Clear All button, when selected, will remove all transmission limitations that have been set under any of the limit types. The Clear button will clear the settings only for the Limit Type selected.
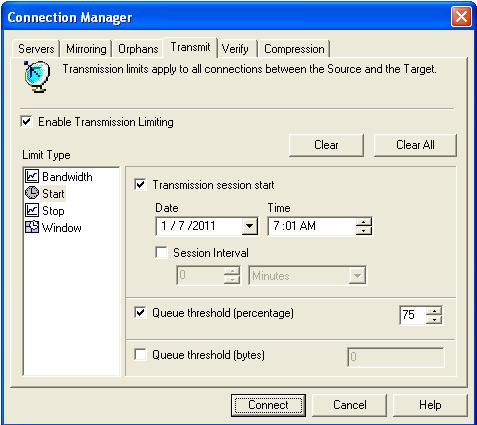
When you schedule transmission start criteria, transmission will start when the criteria is met and will continue until the queue is empty or a transmission stop criteria is met. Select the Start option in the Limit Type box.
Define the start options for Double-Take Availability transmission by using any combination of the following options.

Queue Threshold (percentage) and Queue threshold (bytes)—If the allocated amount of queue disk space is in use, Double-Take Availability cannot continue to queue data causing an auto-disconnect and the potential for loss of data. To avoid using the entire queue, you can configure Double-Take Availability to begin transmitting data to the target when the queue reaches a certain point. This point can be defined as a percentage of the disk queue that must be in use or the number of bytes in the disk queue. For example, if you specify 40%, when 40% of the queue is in use, Double-Take Availability initiates the transmission process and sends the data in the queue to the target machine. The transmission stops when the queue is empty or a Double-Take Availability stop transmission criteria is met. Or you might set a queue threshold of 500 MB. Double-Take Availability will wait until there is 500 MB of data in the queue and then begin transmitting the data. Like other start criteria, Double-Take Availability continues transmitting until the queue is empty or a Double-Take Availability stop criteria is met. Specify a percentage of the disk queue and system memory that must be in use to initiate the transmission process, and/or specify the number of bytes that must be in the source queue and system memory to initiate the transmission process.
A Transmission Session Start setting will override any other start criteria. For example, if you set the Transmission Session Start and the Queue Threshold, transmission will not start until you reach the indicated start time.
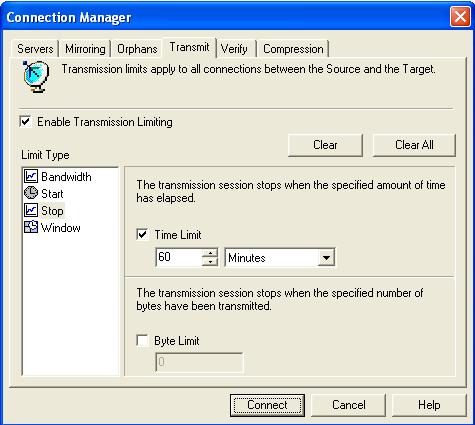
Schedule any desired stop criteria to stop transmission after a transmission start criteria has initiated the transmission. If you do not establish a stop criteria, transmission will end when the queue is empty. Select the Stop option in the Limit Type box.
Define the stop options to stop Double-Take Availability transmissions by using either or both of the following options.

Byte Limit—The byte limit specifies the maximum number of bytes that can be sent before ending the transmission session. When the byte limit is met, Double-Take Availability will automatically stop transmitting data to the target. Any data that still remains waits in the source queue until the transmission is restarted. When used in conjunction with a session start option, you can explicitly define how much data is being sent at a given time. Specify the maximum number of bytes that can be sent before ending the Double-Take Availability transmission.
The transmission start and stop criteria should be used in conjunction with each other. For example, if you set the Queue Threshold equal to 10 MB and the Byte Limit equal to 10 MB, a network connection will be established when there is 10 MB of data in the queue. The data will be transmitted and when the 10 MB Byte Limit is reached, the network connection closes. This is useful in configurations where metered charges are based on connection time.
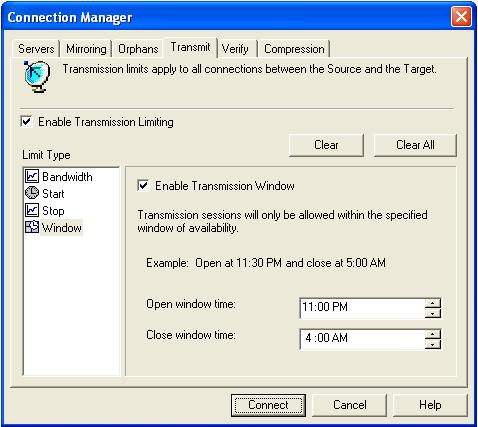
Schedule a transmission window to establish a period of availability for all Double-Take Availability transmissions. You can specify a begin and end time for all Double-Take Availability transmissions. When a transmission window is in effect, all other start and stop criteria are bound by this window. This means that Double-Take Availability will never transmit data outside of an established window, regardless of other transmission settings. For example, if you set a window of availability from 9 p.m. to 4 a.m. and a start option to initiate transmission at 5 a.m., the window option will override the start option and no data will be sent at 5 a.m. Select the Window option in the Limit Type box.
Setting a transmission window by itself is not sufficient to start a transmission. You still need to set a start criteria within the window.
Define a window to control Double-Take Availability transmissions by enabling the feature and then specifying both window options.
